|
Removing Old Stuff
Shipwright's disease may have finally hit! I won't
even go into the list of winter TR6 projects I've come up with, but suffice to
say that the TBI conversion started it all!
Disconnect the Battery before starting
anything!!
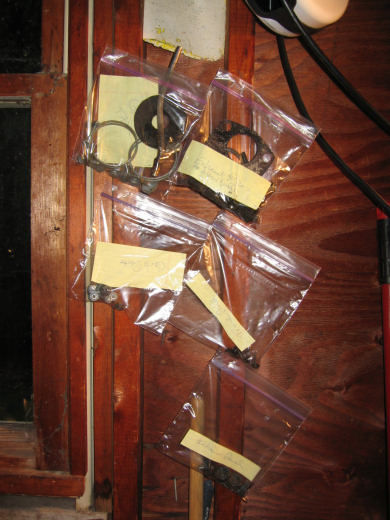
Bag Everything
One trick I learned many years ago was to tag and
bag everything I remove from the car. Three weeks or three months from now,
you'll be surprised how all those nuts and bolts begin to look alike. So every
grouping of parts (e.g. Trunk Panel screws) goes in to a baggie with a label and
it gets stapled to the garage wall!
|
Baggies with Parts &
Labels |
 |
Exhaust System Removal
When I made up my "to do" list in the order that
it needed to be done, install Oxygen Sensor was #1 on the list. I had every
intention of having this welded while the exhaust was still on the car so I
brought it to a garage that was highly recommended for quality welding to make
sure it could be done. Yup....it wasn't going to be that easy but he could do it.
Then I noticed the $70/hr labor rate and decided to take the car home to see how
easily I could remove the exhaust. Step one was putting the car up on jack
stands.
|
Position for the next 4
- 6 weeks |
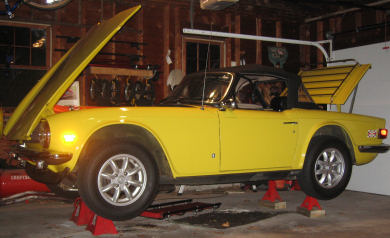 |
Luckily the down pipes separated from the exhaust
manifold quite easily and dropped right down but getting it to "un-mate" from the
exhaust pipe took a liberal overnight soaking with WD-40. The next day it came
right apart so it was dropped off at the welder's shop.
Shipwright #1 now hits as I decide to just remove
the whole exhaust system to give it a good inspection. So off it comes....all
those fluid leaks have kept it in surprising good shape considering it's a 9
year old stock steel system.
Gas Tank Removal
I guess this could be Shipwright #2 but I had
earlier decided that if I was going to TBI, I ought to start with a nice clean
tank....plus it ends up that I need a return line fitting installed in the tank
anyway. The tank removal is pretty easy but requires the removal of the rear
interior panel and the trunk interior panel. Some people may be able to do the
whole thing from the trunk but I have an emissions return line that goes to a
fitting on the interior side of the car. Removal is as follows:
- Drain the tank. I had run the car down to
about 1/4 full so I just drained the last couple of gallons into a 5 gallon
can.
- Disconnect the fuel line and emissions return
line from the bottom of the tank. This is only accessible from under the
car.
- Unplug the sender unit connections at the top
of the tank.
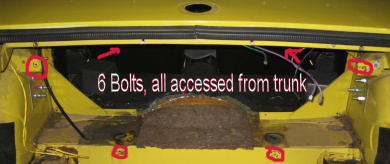
- There's 6 bolts connected to blind nuts (2 on
the top, 1 each side and 2 on the bottom) and all can be removed from the
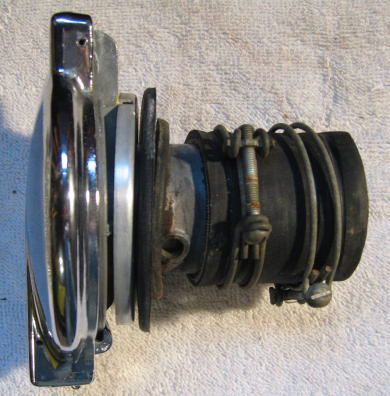
trunk. The gas cap goes in to a rubber filler hose which has 2 wire clamps
(1 for the gas cap and 1 for the tank.
| Filler Cap with
Connecting Hose & 2 Clamps |
Gas Tank Bolt
Locations |
 |
 |
- Once the filler cap hose clamps are loosened, some
twisting and tugging will pull it free from the tank. On the later TR6s there's
a small separation tank that's connects to a fitting next to the filler cap.
You may be able to reach it from the trunk but it was a lot easier to
disconnect from the interior side.
- The tank should now just lift out.
I brought the tank to a local radiator repair shop
where they will give it an acid bath, clean it, pressure test it and repair as
needed. They'll also install a 5/16" fitting for the new return line as well as
a larger outlet fitting for the new fuel line I'll be running. More on that
subject when I re-install the tank.
Coil Removed
The ECM unit for TBI requires an un-ballasted coil
so my internally ballasted Lucas Sports coil is gone and will be replaced by an
MSD 8202 coil.
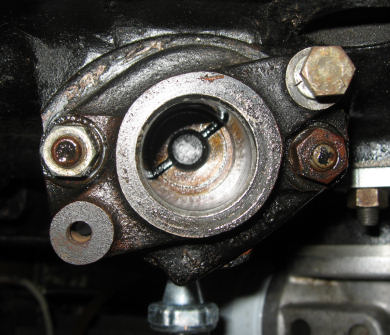
Distributor Removed
Before removing the distributor I pulled the #1
plug and turned the engine by the fan until the timing mark hit TDC. This also
resulted in the rotor pointing at the #1 terminal on the distributor cap. After
all this "prep" I was told that you can't put it back in wrong because the "dog
ears" in the bottom of the housing only allow installation one way. Just don't
turn the engine over while it's out. Now, having said all that, it won't matter
as my distributor is being converted by John to work with the ECM module
that controls the TBI system.
|
Distributor Mount -
"Dog Ears" |
 |
Next Up....O2 Sensor &
TPS
|


