|
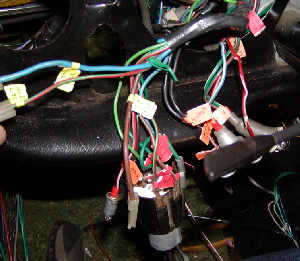
The "DASH".... Oh My God!
My mantra for the rest of this
installation is: "I trust Dan Masters, I trust Dan Masters, I trust Dan
Masters". Prior to adopting that mantra, there was a lot of "Oh my God, what am
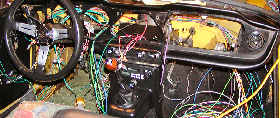
I doing tearing out all this wire under the dash?" At this point I cut all the
old wires from the front and rear of the car so that I was left with that mass
of wires that are up under the dash. On my main page there's a link to
November 1997 which was the first time I pulled my
dash and labeled everything. I pulled it again in May 1999 and I re-labeled
every wire with these little Jeweler's tags, the kind that they put around a
necklace strand and are impossible to tear of remove. Almost 6 years later and
the tags are still firmly in place.
I spent a lot of time with a razor knife trying to
cut away all of the harness wrap while not cutting a finger off. No small task
given the room you have to work in under the dash. Add in all the sharp edges on
the metal dash and it's amazing that I haven't drawn blood yet.....well maybe a
little blood. Once i had a good idea where all the wires went I cut the harness
free and pulled it out from the dash. Now I was able to remove the rest of the
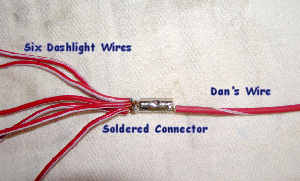
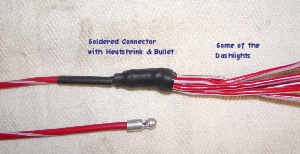
tape and cut all the bulbs free while retaining all of their wire. Seeing as all
of the bulb wires are "hard-wired" right to the bulb, you don't want to cut them
too short. These dash bulb wires are the only original wires you'll retain along
with a few other wires that are hard-wired to their "device: e.g. horn, turn
signals, ignition switch. All the dash bulbs that go on with the headlights are
wired together from the factory with some sort of wire nut. I wanted a more
permanent connection so I got these connectors that enabled me to solder
everything up tight.
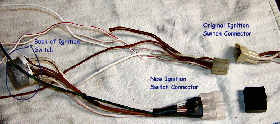
Here's an ignition switch comparison that shows
the original connector and the new one. The easiest way to do this is to remove
the back module of the switch and do the wiring in on your workbench.
So at this point here's how the dash area looks as
I begin to pull the new wires to their approximate position. "I trust Dan
Masters, I trust Dan Masters, I trust Dan Masters".
January 17th.......... BRrrrrrrrrrrrrrrrrrrrr....we've
been hit with a cold snap with today's temps in the teens and forecasted for
single digits this week. My 55,000 BTU heater is real good down to the low 30's
and scrapes by when it's in the 20's so I won't be working in the garage for a
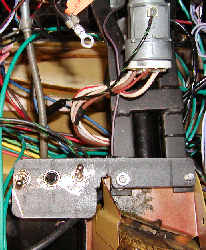
few days. As a result this was a good time to work on the mounting arrangement
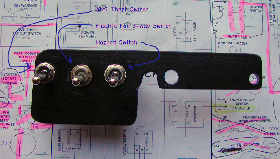
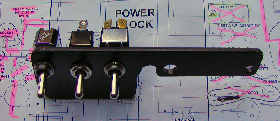
for the auxiliary switches that Dan supplies and/or recommends you install. For
my installation I'll be installing the two switches he provides as the hazard
switch and the "anti-theft" switch. That switch kills all power to the power
block. I also bought a single pole, double throw switch for my electric fan.
This will give me 3 options: On, Off and Auto-run. The tricky part was finding a
suitable place and way to mount them. Seeing as I had some steel plate left over
from my hood release project, I used
that. I decided to mount the "panel" on the steering column bracket. It's off of
the way from the heater/demister hoses and is easily reached from the driver's
seat.
More Dash Wiring
here!
|