|
Running the Wires under
the Hood/Bonnet
Before running any wire you need a
couple of good tools: GB Crimping Pliers and British Wiring's Bullet Crimper.
This one's a bit pricey @ $45 but it gives you a perfect bullet crimp and
totally eliminates the need to solder the bullet connections. For that alone
it's worth the price. I am soldering all the other connections as I'm not
thrilled with the quality of the crimps that I'm getting with the GB tool. I'm
sure it's me and not the tool.
The first thing you do is lay out all
the wires according to how you want to route them under the hood (yes I know
it's really a bonnet) and always remember that old carpenter's adage "measure
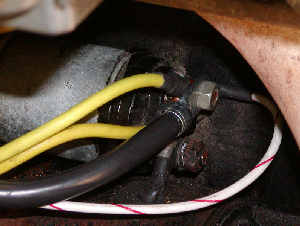
twice, cut once". The left shot shows the wire run to the starter and the main
harness under the cowl while the right shows the solenoid connection.

Once everything is laid in place,
you can cut them to length and terminate them..... one at a time. I started on
the right side of the car and have completed the: starter solenoid, horn,
headlight, turn signal and side marker. Everything was going fine until I
pulled the carbon canister to gain access to the anti run-on valve and found one
of the wires to be hanging on by a thread.... and then it wasn't...
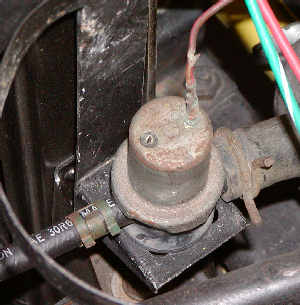
I don't even know if the valve works so I plan on
running the new wire to it and tie it off in case I have to replace the valve
after I finish the job.
December 16th: Today I finished the front of the
car and have connections to the headlights, turn signals, side markers. horns.
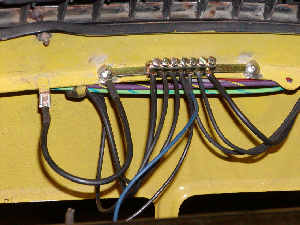
alternator, coil and distributor. Dan supplies 12 ga wire for grounding the
headlights and 14 ga for all the other connections so I got a grounding block
and mounted it just below the grill.
I know I have a good solid ground
with this set up. What I don't know is how it'll stand up to vibration over
time. Maybe after I finish the job and test everything I'll use some Locktite on
the set screws.
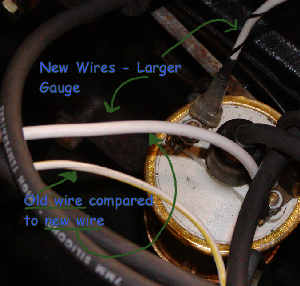
Pretty much every wire in this kit is
at least 1 gauge larger from standard. Below is a comparison of the 12 ga wire now
run to the coil versus the old 14 or 16 ga that was standard. Even the coil to
distributor wire (white/black) is a size or 2 larger.
The only problem I've run into so far
has to do with the electric fan. Because of the relay type used by Hayden for
their fan, Dan is trying to figure out an alternative way to wire it from his
power panel and using the recommended double throw switch. No big deal as all of
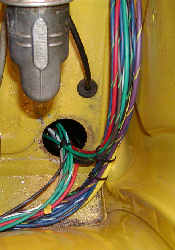
the wires have been run and tied off. So here's the wires from under the hood
that now have to go back into the interior. I need to get a new firewall rubber
grommet as the old one is pretty beat up.
Next
Up... the interior wiring
|


