|
Trailing Arm Bushing Installation
I've got multiple things going on
that led to my decision to replace the old Trailing Arm bushings
with Goodparts' Nylatron bushings. First, my rubber bushings are
10 years old. Second, I'm installing his Trailing Arm Kit and
Third, I'm doing his Nissan differential upgrade.
I previously showed you
how to remove the old bushings
and installation of the Nylatron is quite easy IF you follow his
directions. DO NOT just pound the new ones in place and expect
them to fit. Unlike the front suspension, the trailing arms are
aluminum and subject to deformity and variances in hole diameter
and arm width.
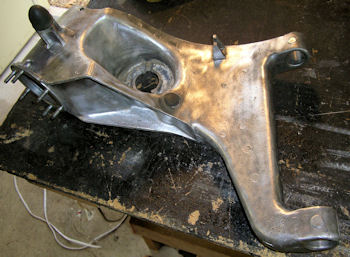
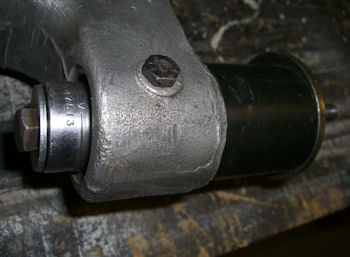
But first let's take the time to
clean up those old dirty trailing arms. I hit mine with an
assortment of wire brushes on my grinding wheel and drill. Not
as good as having them bead blasted but they're good enough for
me.
|
Not too shabby for a few
hours work |
 |
 |
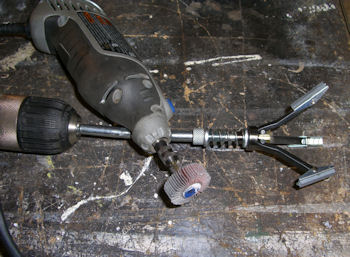
Once you get them cleaned up on
the outside, you need to clean out and true up the bushing
holes. This is best accomplished with a Dremel flap sanding
wheel and brake cylinder honing tool. The flap wheel is far more
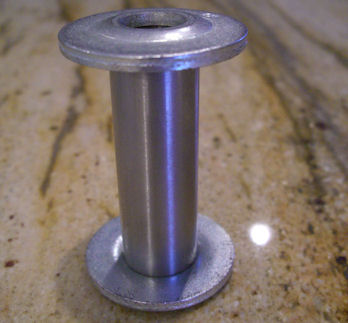
aggressive and the honing wheel really smooth's things out. The
"tool" on the right consist of a 6-1/4" bolt, a 3" piece of
1-3/4" PVC pipe, an old differential mount washer and a 15/16"
socket. More on that later.
| The
Obvious Tools |
and then
there's this Tool |
 |
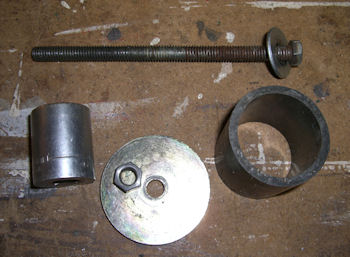 |
If you read the Goodparts'
directions you'll see that you have to test fit each individual
bushing BEFORE installing both bushings. The idea here is to
true up the hole, install one bushing, test that the stainless
sleeve slides easily in and out, remove the bushing and repeat
on the other side. There's 4 bushings per arm so you'll do this
4 times per arm. DO NOT install both bushings at once until
after you've tested the fit of the stainless sleeve. The problem
is that you can pound in a bushing but the sleeve hole will be
slightly deformed binding up the sleeve. You HAVE TO WORK one
bushing at a time. The bushings themselves ARE NOT a finger
tight fit. I used a 28 oz dead blow hammer to get them to the
point in the picture below and then snugged them up with the
"tool" in the picture above.
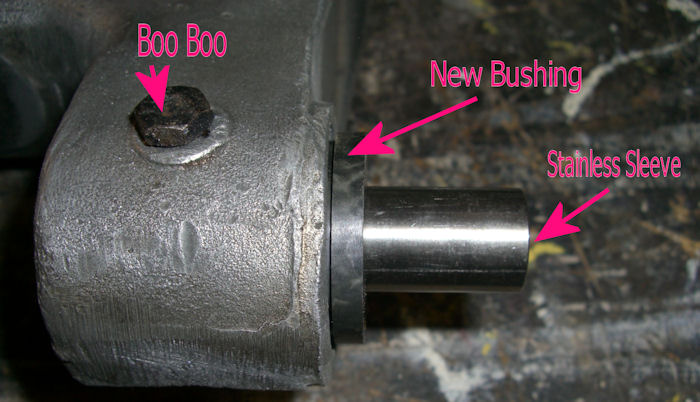
|
That Sleeve should slide
back and forth with slight finger pressure. More on
the Boo Boo later |
 |
|
Here's how those
tool components go together to pull the bushing back out.
Now test fit the other bushing for this side. Once
they both fit correctly you can install both on one
side on one arm. |
 |
 |
This is how I used the
"tool" to snug each bushing in to place.
The socket pulls it tight to the arm.
It will be obvious when it "bottoms" out |
 |
 |
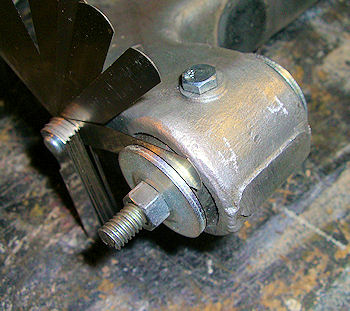
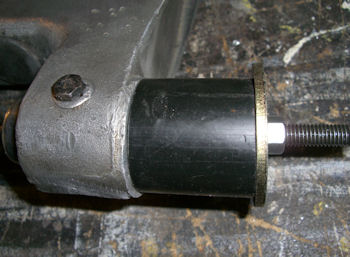
Once you get all 8 bushings in
place you need to determine which size washers to use to obtain
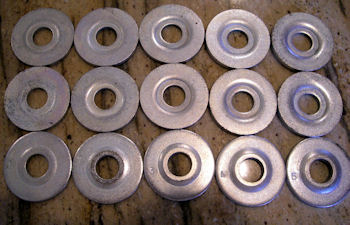
the proper clearance within the bracket. The kit includes 15
washers....... 5 sets of 3 different sizes. Grab a bolt and a
feeler gauge to get the right combination.
| 15 washers with recess from .010
- .050" |
They'll sit on sleeve like this |
 |
 |
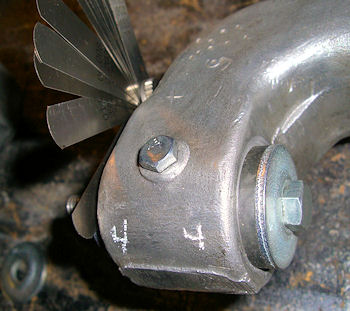
IMPORTANT: Here's the step that people don't
understand or forget to do. You DO NOT determine the
washers to use by putting the assembly in the bracket. The
bracket is deliberately set wide to make installation easier.
When you torque the Pivot Bolt to the proper setting it will
snug the bracket up against the washers. So how do you determine
the proper washer thickness to use? Very easy.....Just slide a
bolt though the whole assembly with assorted sized bushing on
both sides, tighten and measure. Keep trying different
combinations until you find one that works.
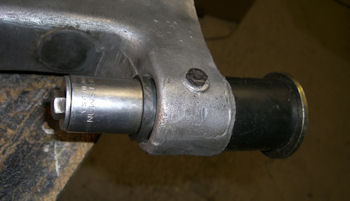
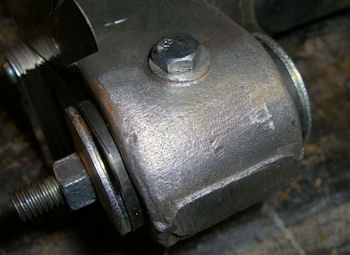
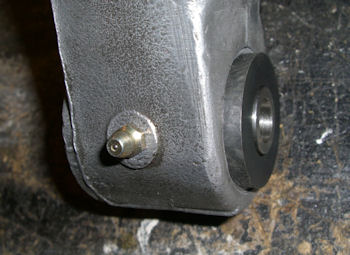
Oh yes......the Boo Boo...........
Goodparts recommends the installation of grease fittings on the
trailing arms. Even thought Nylatron is self-lubricating, it
doesn't hurt to hit it with a shot of grease now and then. The
directions say to "install a fitting straight down......." which
I interpreted to mean install a straight fitting as opposed to a
45 or 90 degree fitting. What he really meant was to install a
straight fitting pointing down.............as in a fitting on
the BOTTOM of the arm. DUH...........my first set of holes were
drilled into the top of the arm and, trust me, that won't
work.....won't even come close to working. Hence the plugs on
the top of the arm.
| Wrong
Way |
Right
Way |
 |
 |
Time to move on to the
adjustable kit.
|