|
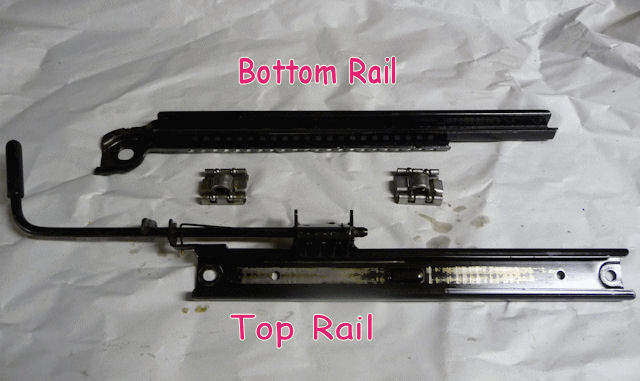
Seat
Rails
NOTE: The
Miata seats are asymmetrical just like a TR6 so there's
a driver's seat and a passenger's seat and the two are
not interchangeable. Make sure you mark the pieces
Driver or Passenger.
The Miata
seat rail are much nicer than the stock TR6 ones and I
wanted to use them rather than try and modify the TR6
rails to the Miata seat pans. Here's how I did it.
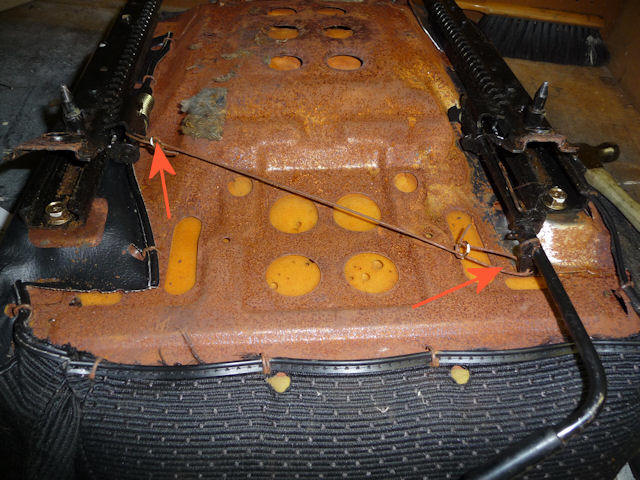
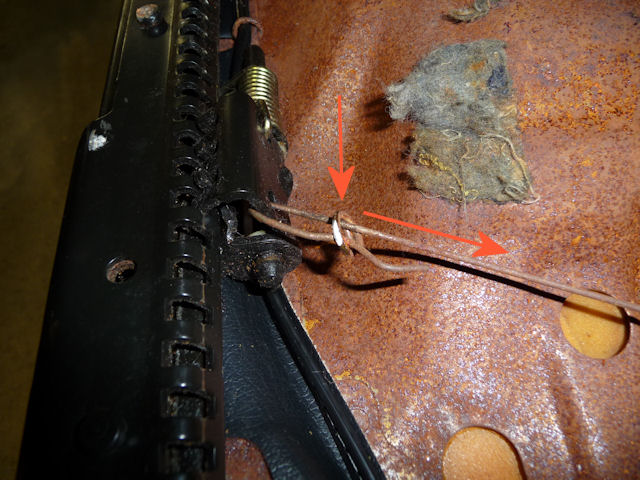
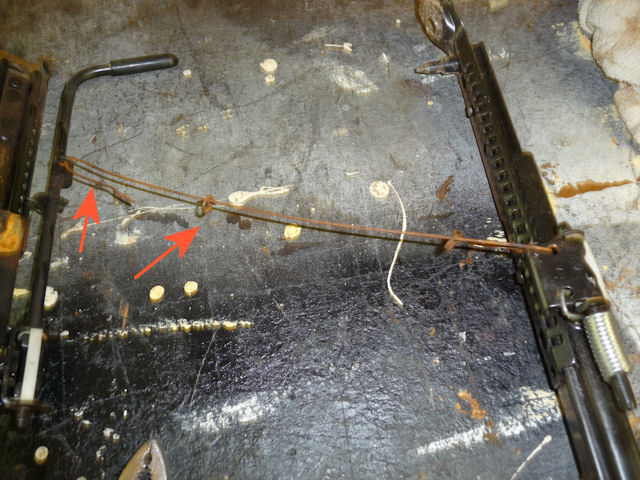
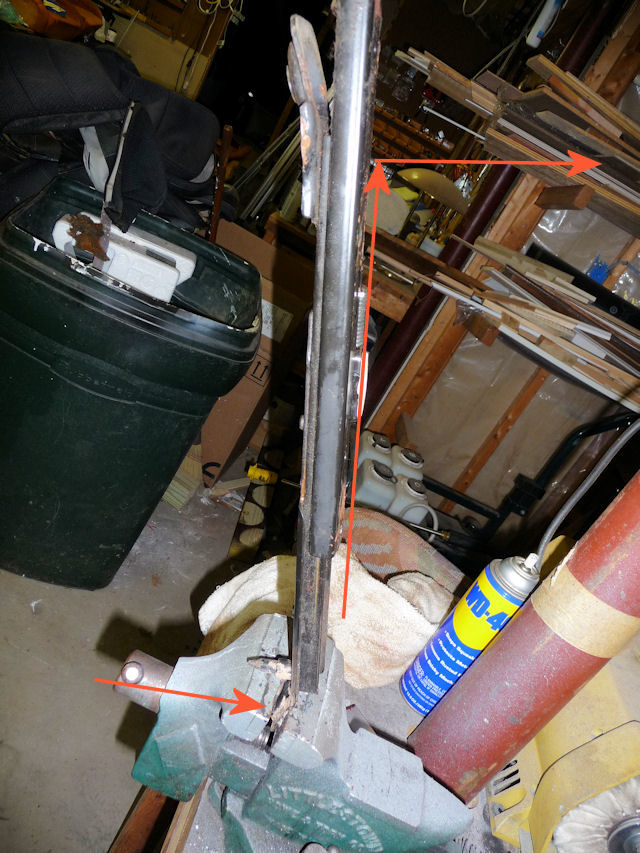
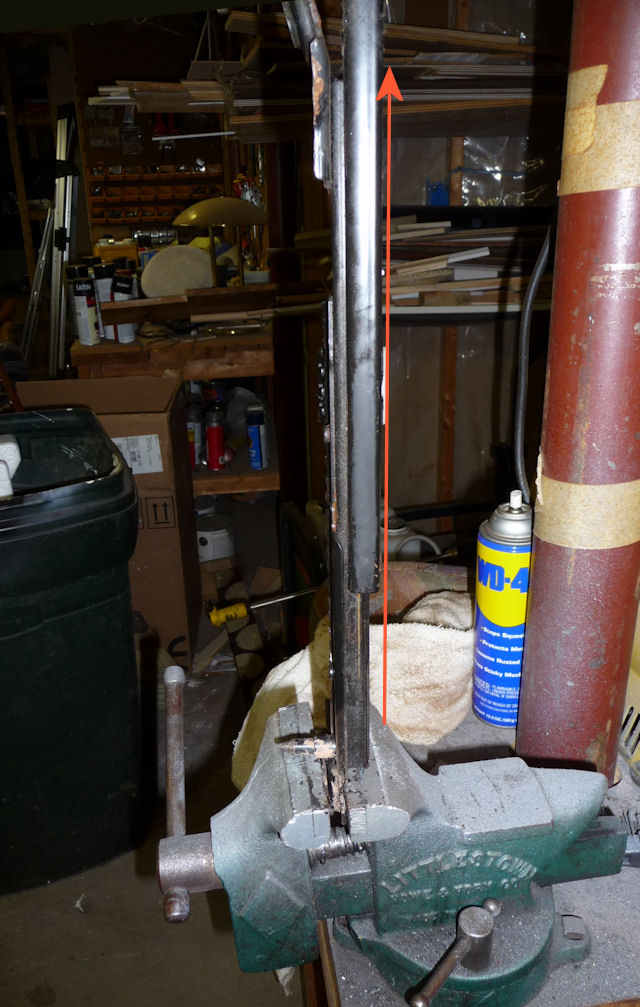
For some
reasons guys have problems with this next step. What
you need to do is flatten or straighten the front of
the rail. I read posts in the forums where they're
beating on the rail with BFH trying to get it to lay
flat. My solution was much simpler. :-)
If you
plan on buying either
Rick Patton's brackets or the A.R.E. brackets... DO
NOT remove the rear pieces from the seat rails.
|
NOTE:
If you plan on buying either
Rick Patton's brackets or the A.R.E.
brackets... DO
NOT remove the rear pieces from the seat rails.
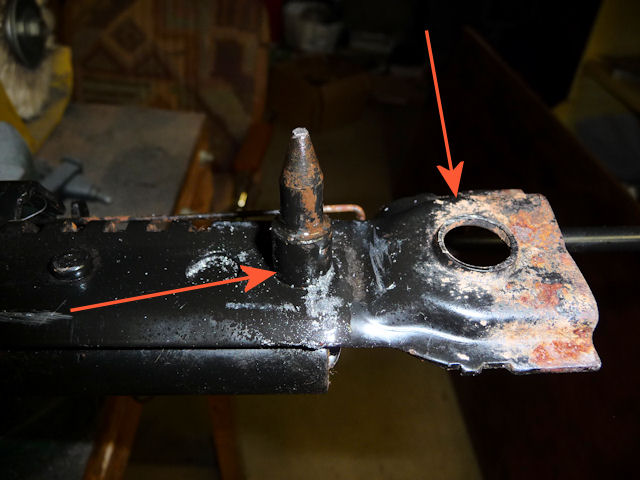
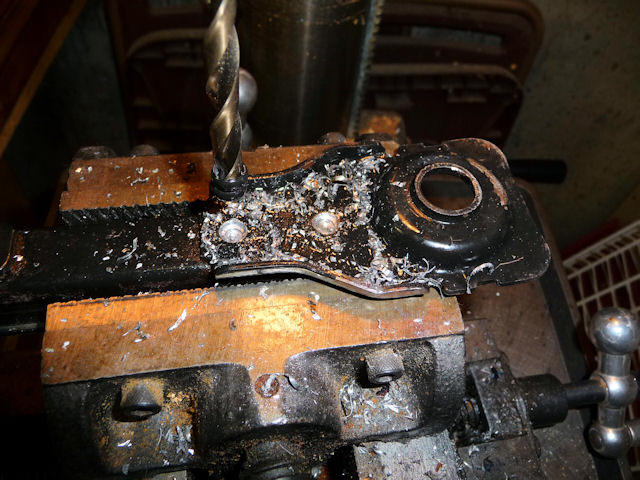
Time to work on
the rear end of the rails by drilling out
the rivets. |
 |
|
NOTE:
If you plan on buying either
Rick Patton's brackets or the A.R.E.
brackets... DO
NOT remove the rear pieces from the seat rails.
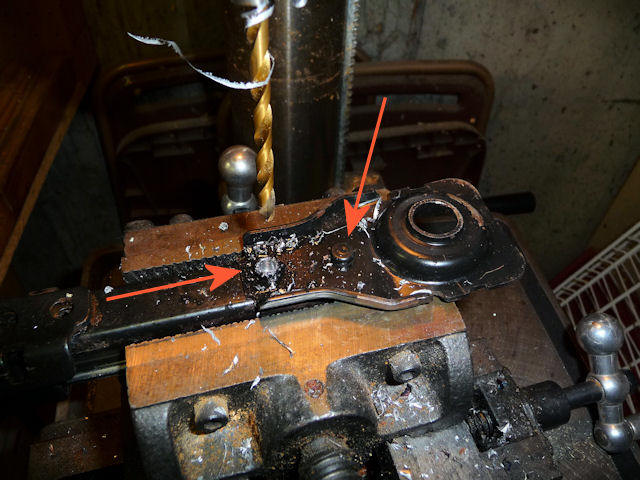
With both
drilled..........hit 'em with a punch. |
 |
|
NOTE:
If you plan on buying either
Rick Patton's brackets or the A.R.E.
brackets... DO
NOT remove the rear pieces from the seat rails.
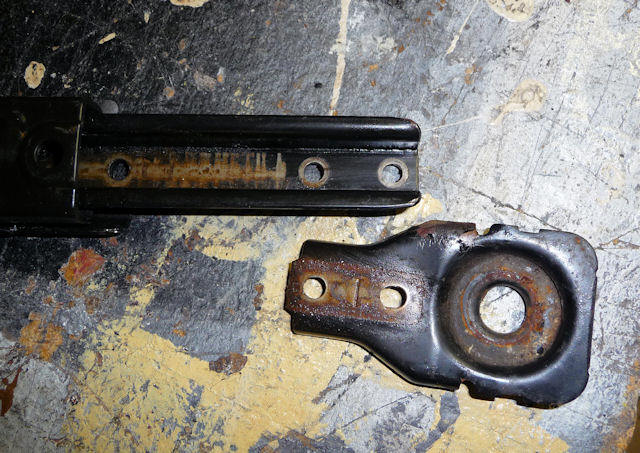
And the foot is
loose...........and not required. |
 |
Up above
I warned you not to remove the rear bracket if you
planned on buying either
Rick Patton's brackets or the A.R.E. brackets.
The problem is, as I recall, you can't take the
rails apart for a thorough cleaning unless the
bracket is removed.
I
had to reattach that rear piece to install Rick
Patton's brackets as you can see in this section of
my site.
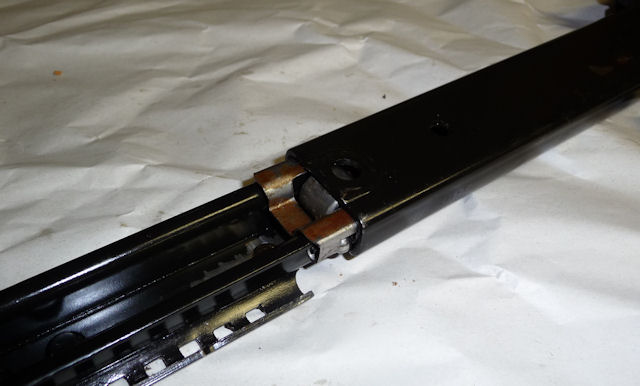
Now you may want to clean the rails up to get them to
roll easier. These work a lot smoother than the
stock TR6 seat rails once all the gunk has been
cleaned out of them. On the advice of one of the
6-Pack Forum members, I picked up a spray can of
Break Free CLP in the gun department of Dick's
Sporting Goods. Any gun shop should carry this stuff
and it works great........man is it slippery. I let
it soak in for a while and then pulled the rails
apart. This is easier said then done and required
some persuasion with a hammer and punch. Before you
start knocking them apart look through the pictures
below so you don't end up with little ball bearings
rolling all over the place.
|
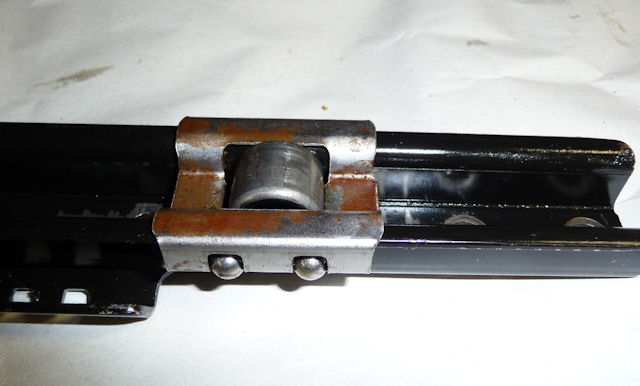
Here they are
separated. The roller mechanisms in the
middle are what you have to watch out
for.....so keep your hand under the rails as
you see them begin to appear. |
 |
|
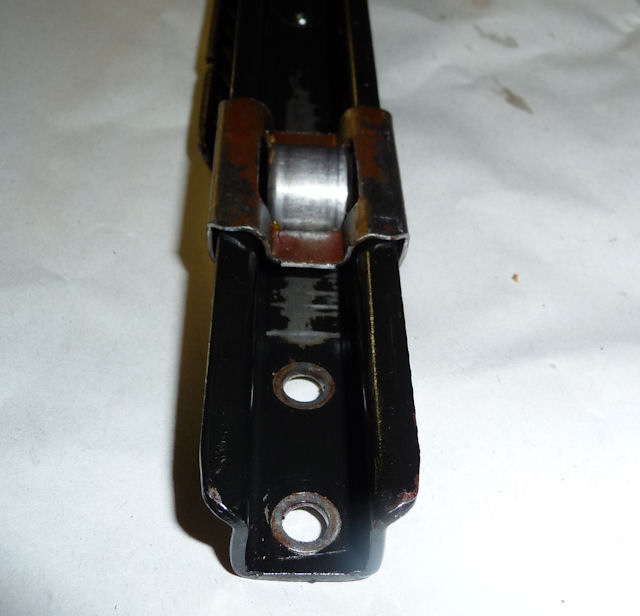
When I took them
apart, the rail was in the vise upside down
from this picture so the first roller hit
the floor, followed by two ball bearings. |
 |
|
Another View |
 |
|
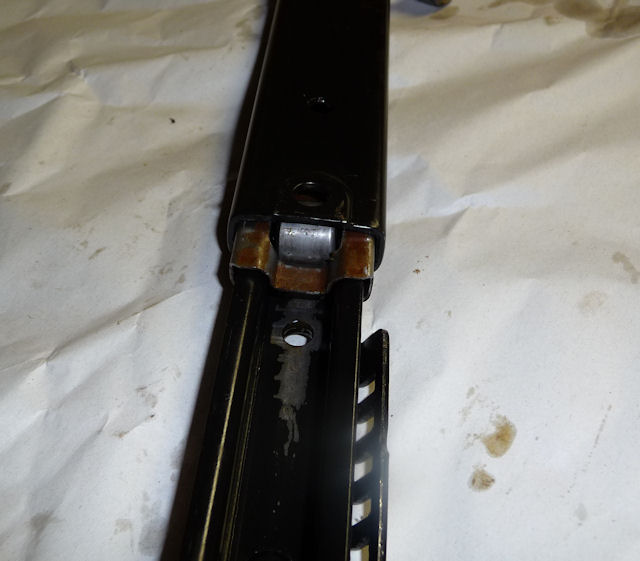
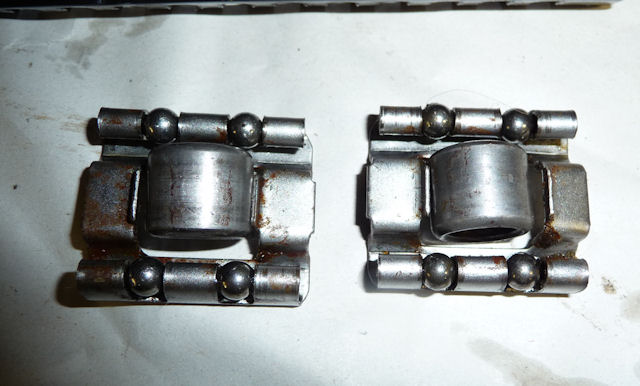
Fully exposed.
Note how everything rides in the mechanism
and in the rails, as assembly is the reverse
of disassembly. |
 |
|
Last view |
 |
|
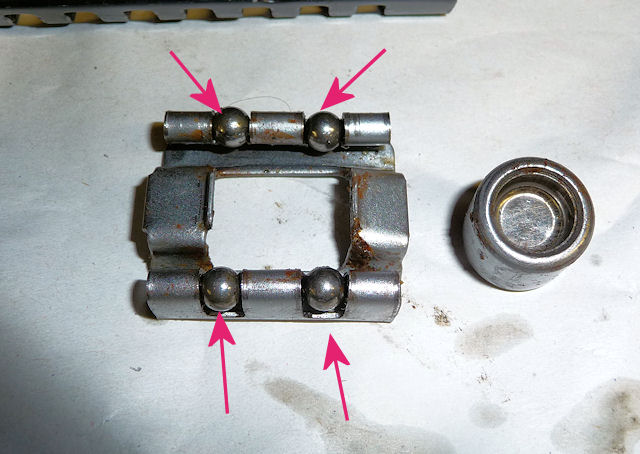
Two rollers per
rail. The big bearing in the middle just
rests there with nothing holding it in
place. The ball bearings on the other
hand.................... |
 |
|
They should be
pinned in place but I had a few fall out. I
had to bend the bracket a little to get them
to hold the ball bearings in place. Don't
forget some lube. |
 |
I hate to say
it but reassembly is done in the opposite
order............and it will require a hammer.
Time to
get the speakers wired up
before doing the new upholstery.........
|