Normally I'd
have a ton of pictures showing the whole installation
process but I forgot to bring my camera when I went to
my friends upholstery shop! As it turns out, they are
pretty easy to install and the pictures showing how I
took them apart are what I referred to when putting the
new covers on. And in the best Haynes or Bentley manual
tradition..........Assembly is the reverse of
disassembly! All you need are Hog Ring pliers, hog
rings, 3M Super #77 spray adhesive and some coat hanger
or thicker wire.
There are
excellent instructions included with the seats and I
also
used this terrific guide from the Miata.net web
site. I STRONGLY recommend you read the Miata.net guide
a few times to understand the removal and installation
process.
NOTE:
The covers from the eBAY auction are what is called a
loose fit i.e. a gathered or wrinkled look. It IS NOT
a tight smooth fit..........which is actually better for
us amateurs.
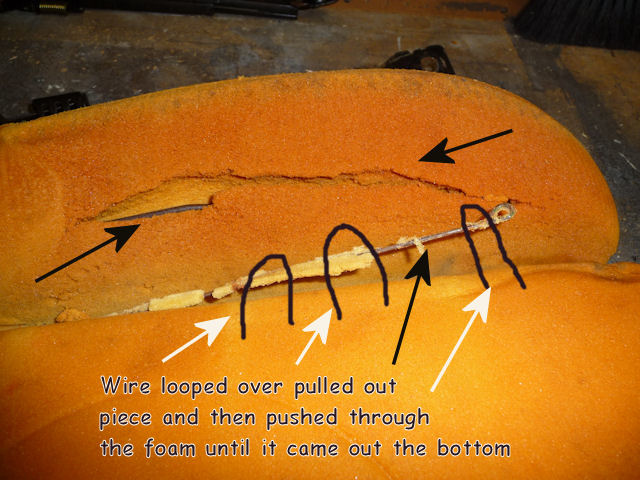
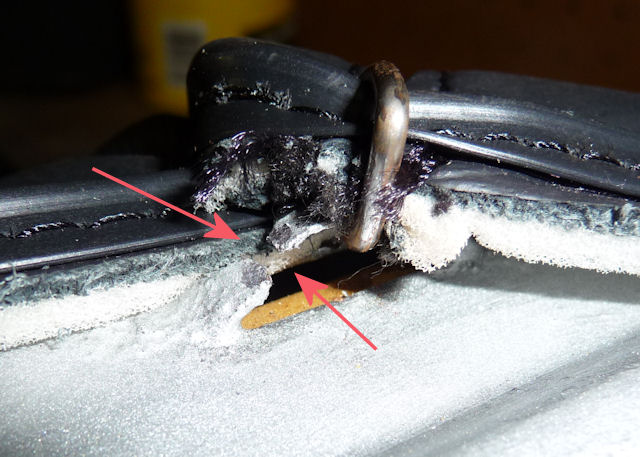
The only bad
foam on my seats was the driver bolster
where you get in and out of the car. This
actually wasn't too bad compared to others
that I've seen and felt. That wire sticking
up is very important as that is what the hog
rings will attach to, to hold the bolster
leather nice and tight. I put a few pieces
of flexible wire (black lines) over the wire
and pushed the pieces through the foam until
it came out the bottom.
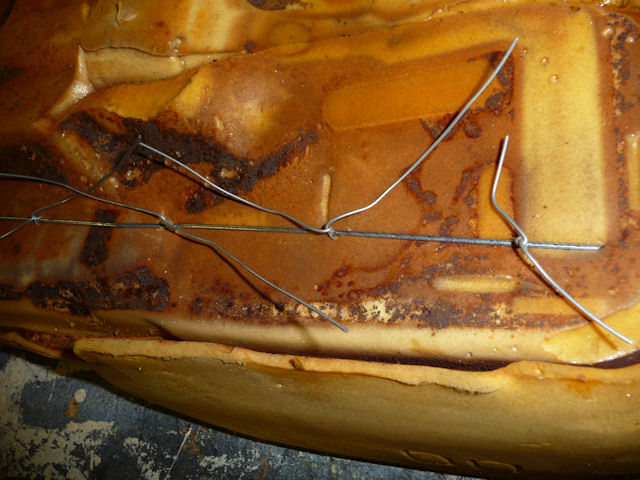
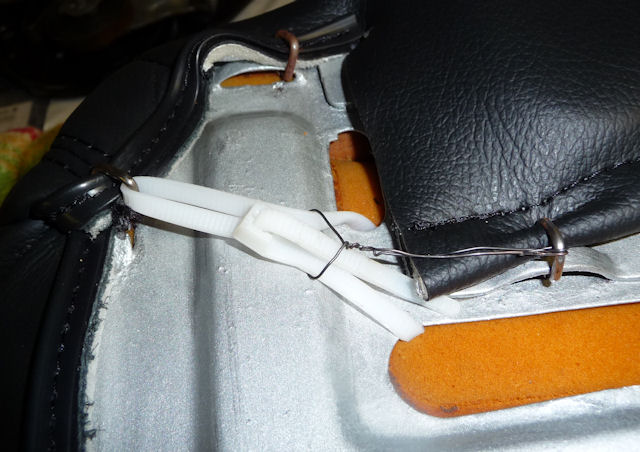
Then I took a
stiff piece of wire and laid it across the
bottom of the cushion, pulled the other
wires down and wrapped them around the stiff
wire. This brought the hog ring wire down
into place and gave it support and strength.
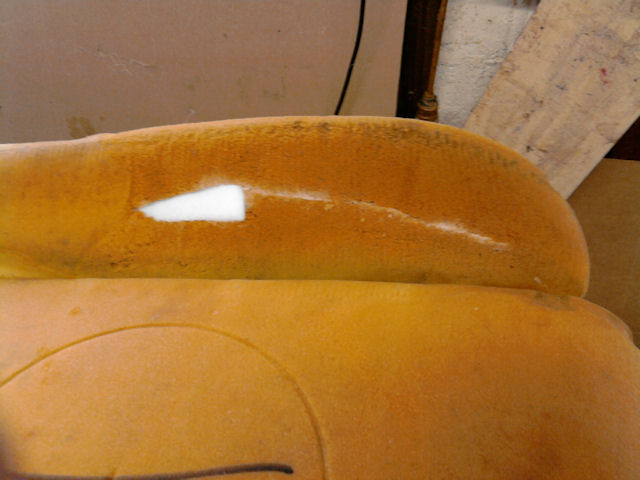
The cracked
bolster was filled with some foam and glued
together.
Some fabric was
glued over the bolster and the seat was good
to go.
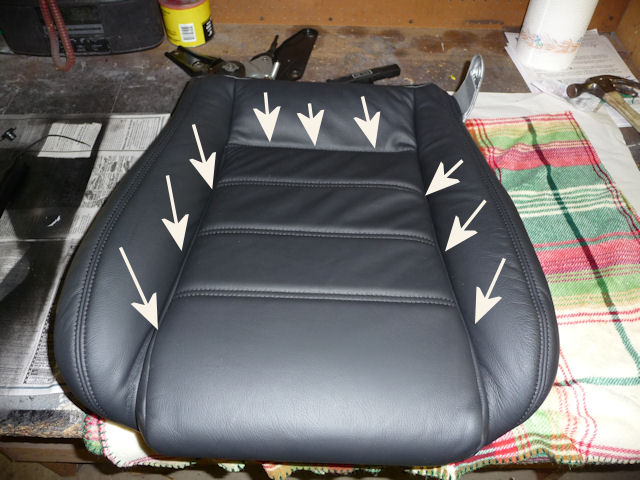
Now turn the
seat cover sides inside out attach the 3 hog
rings at the back of the seat. Then starting
at the rear of the side bolsters attach 3 or
4 working from the rear to the front and
alternate sides i.e. do right rear and then
left rear, do next right rear and next left
rear. It's obvious where they go as there
are holes in the foam from the old hog rings
that you removed. At this point the bottom
and sides are hog ringed to the foam so pull
the bolster covers back over the foam sides
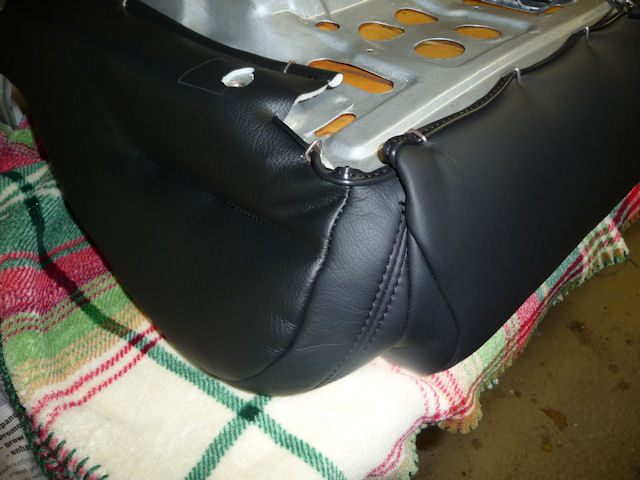
and over the hinge.
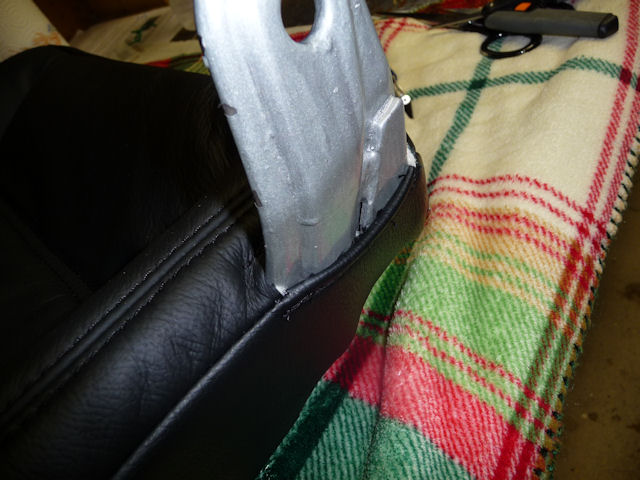
This is the hinge
side of the seat.
They give you a
nicely stitched slot for the hinge to go
through.
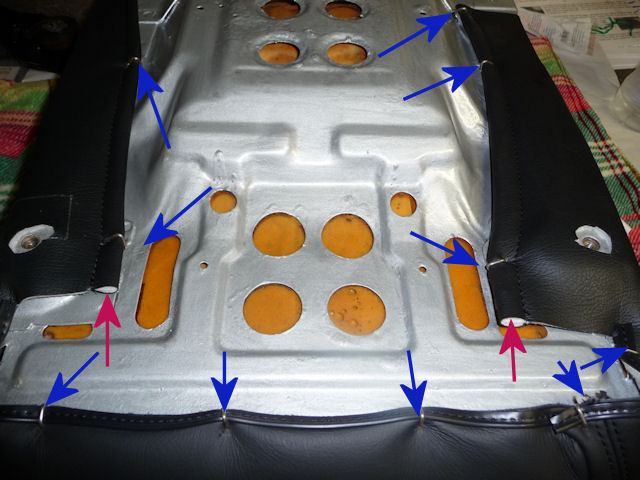
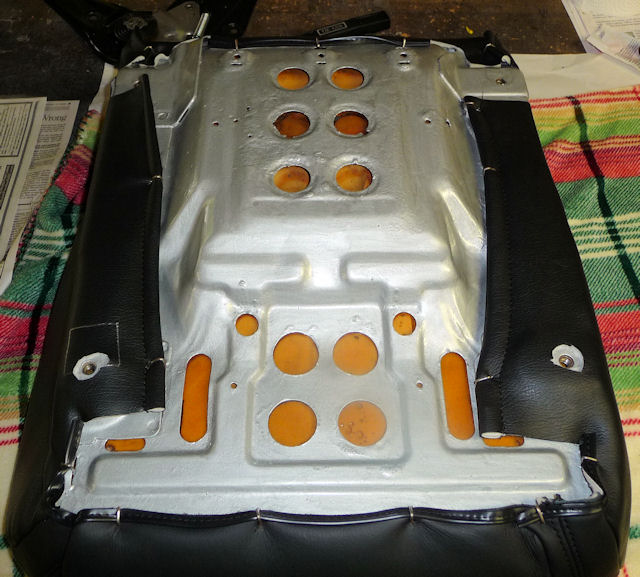
Now you can
pull the cover over the bottom of the seat
pan and attach at all the blue arrow points.
The pink arrows refer to the place where we
inserted a steel rod.
The
instructions say that this is optional, but we
had some rod and decided to use it. You
could even use a coat hanger. Most of the
hog ring attachment points are those punched
out slots you see by the bottom arrow.
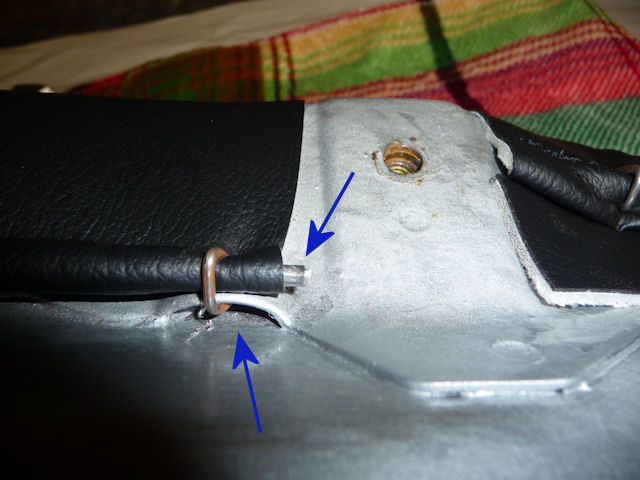
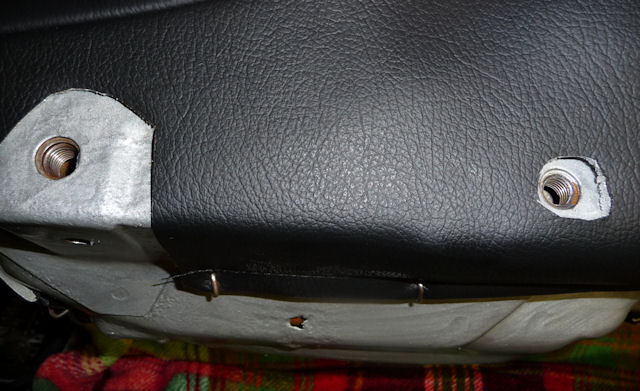
I had one problem
with a broken attachment point so I added
some reinforcement.
I wrapped a
wire tie around the seat pan and through the
hog ring to make sure it didn't pull loose.
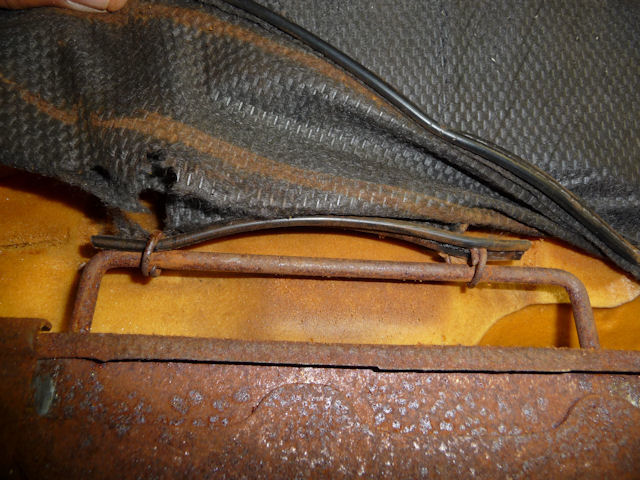
Remember this
from removing the old covers?
Here's what
it looks like when the cover is finished. It
basically gives the cover some shape in that
area.
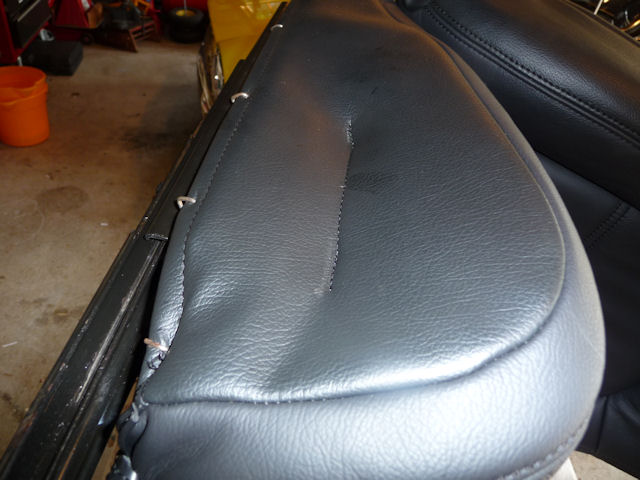
Here's what the
finished corner looks like.
The driver
and passenger side are different as to how
many of the seat rail holes are covered and
need to be cut out.
These are for
the tilt mechanism. The left cut is already
on the cover so you only have to do the
right hole. Make sure you cut enough
material so you don't have to worry about
catching the bolt on the leather and tear it
or cross thread the bolt.