|
Gaskets and Seals
Most of my oil loss isn't from
burning oil but from leaking oil..................or as we LBC
owners like to say...."From my car marking its territory". The
good part about oil leaks is that it coats the bottom of the car
with oil and grime and keeps things from rusting. I was
determined to clean up as much as I could while the engine and
tranny were out.....it's messy enough getting all dirty when you
pull things apart but why get dirty all over again when you put
it back together? So I did a lot of cleaning and then some
painting.
The first oil leak I went after was coming from
the bottom of the timing cover. For that I installed a new front oil seal and a
new gasket. The gasket got a smearing of Ultra-Black on both sides and the seal
basically presses in place.......well there might have been a wood block and
hammer involved too. Make sure you position the tensioning spring correctly
against the timing belt. It's easy to miss as it falls down and rest quite
nicely in the bottom of the cover.
|
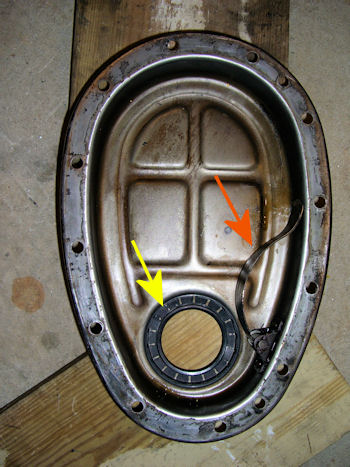
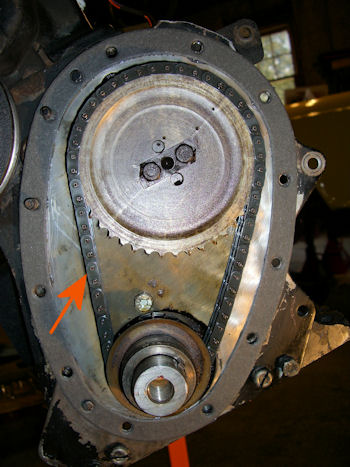
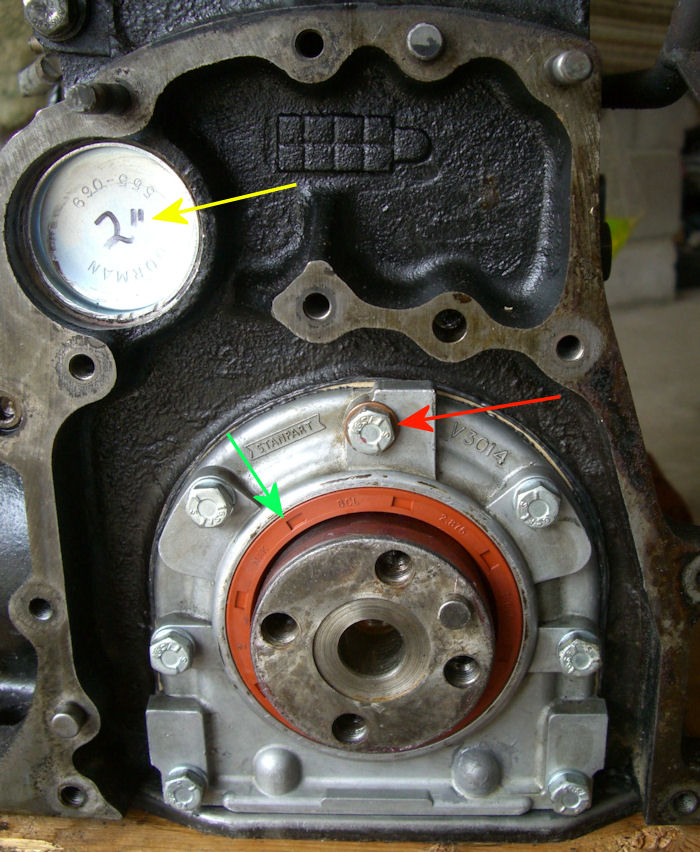
The yellow arrow is the
new seal while the orange arrows point to the timing belt and the
tensioning spring. It takes some creative thinking to get the spring
properly positioned. |
 |
 |
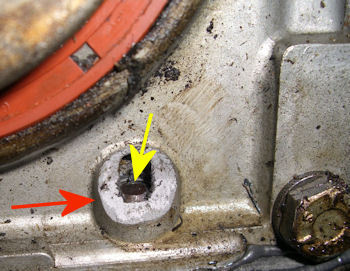
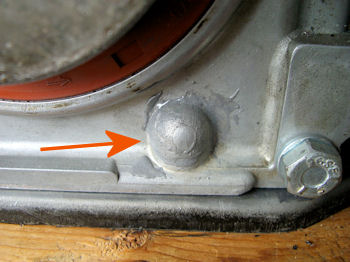
Next big leak was coming from the
back of the engine where I found two surprises.......neither one good. The
first bad news was the broken piece on the allow cover where one of the oil
pan bolts screw in. The good news was that the piece was resting right there
and it was just the cap and there were no threads involved. I thoroughly
cleaned the area and used some JB Weld to put it back together.
|
Orange arrow shows the before and after. The
yellow arrow points to the end of the bolt. |
 |
 |
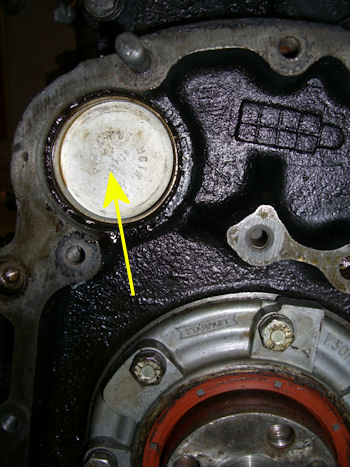
Next up was the plug you see that
covers the end of the camshaft. Granted the plug was in place but it was so
loose you could spin it very easily with your finger. What was strange
was the lack of an oily mess back there. In any case it was coming out and a
new one was going in. Even though it was loose, it wasn't coming out easily.
I had to drill a hole through it, then screw in a sheet metal screw and use
a claw hammer and a block of wood to pry it out. Once it was out, I
replaced it with a 2" plug and lots of red Loctite.
|
This has to go....if I can get it out! How can
something so loose be so hard to remove. |
 |
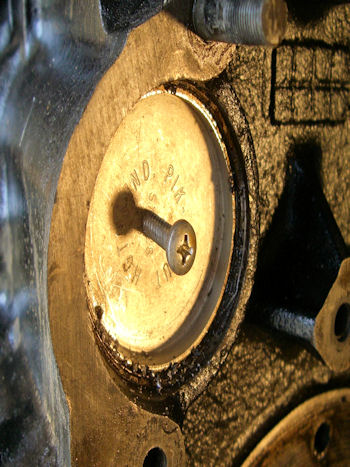 |
The new plug is finally in place
as is the new rear oil seal (green arrow). The red arrow is pointing to the
very important copper washer that goes behind this top bolt. It's the ONLY
bolt that gets one so don't lose it.
|
All back together and
ready for the back plate to be put back on. |
 |
I also replaced the oil pan gasket
but forgot to take pictures which is too bad as there's a
problem area that you need to be careful with. Basically at the
front of the engine is an alloy block that the pan bolts to and
at the rear is the allow rear seal cover that the pan bolts too.
It is VERY easy to strip the threads in these two alloy pieces.
I found one of the threads striped in the front alloy block. I
had two options: install an insert like a Keen-Sert or a Heli-Coil
or drill the out and re-tap it with a 3/8" coarse thread.
There's not a lot of material to work with so I opted for
re-tapping the hole a size larger. For installing the gasket I
used a smear of Ultra-Black on the pan, put the gasket down and
another smear of Ultra-Black on the engine bottom. With the the
engine out of the car it's pretty easy to do with the engine
upside down. I put the bolts in finger tight......and unless the
previous owner screwed up, you should have four bolts that are
longer then the others. Look at the rear of the pan carefully
and you'll see that there a short two hole section on each side
that is thicker then the rest of the pan. That's where the
longer bolts go. For tightening the bolts I started at the
middle and went side to side and working toward the front and
back equally. When it came time to torque them to spec I did all
but the 4 that go into the alloy pieces previously mentioned.
Those I just snugged down by feel. I didn't want to risk
stripping the threads again.
Once I got all the gaskets and
seals replaced I hoped that there wouldn't be any more leaks.
Talk about being a dreamer! My biggest leak concern was around
the front aluminum block that has 2 wooden wedges driven into
the gap between the aluminum block and the engine block. Time
will tell what happens but I doubt it could ever be worse then
it was. Post Note: May 19,
2008........after the first 150 miles of driving I noticed a
drop or two of oil on the garage floor....and it was coming, of
course, from the area of the front and rear alloy blocks. I got
under the car and re-tightened all the pan bolts by "feel". I'll
let you know if that made a difference in a few weeks.
New Engine
Mounts...........here |


