|
Trailing
Arm Jig - The Kit Contents
The six studs that hold the hub and brake plate to
the Trailing Arm (TA) are prone to stripping even when staying at the
recommended 16 lbs of torque. The problem lies with the fact that the TA is cast
from aluminum. One solution is to drill out the 5/16" stud hole and tap it to
3/8" but you're still dealing with a steel stud being anchored in aluminum. The
better solution is to use a locking threaded insert like KeenSerts which are
easily ordered at WWW.McMaster.com part#
92070A250. The challenge, however is in drilling the old holes out the required
insert size while maintaining the drill and tap exactly perpendicular to the TA
face. Even the studs as installed at the factory have some misalignment in them
which required the holes in the axle hubs and brake back plates to be slightly
oversized.
I had a few people on the various Mail Lists and
Forums suggest the use of a jig to maintain alignment but no one has ever made a
precision jig that could make this virtually "foolproof". And that is where I come
in......the fool. Basically I drew up a design that had the jig anchored to 3 of
the 6 studs while drilling and tapping one of the studs. Then you'd move the
whole assembly to 3 more studs so you can drill one more hole. I shared the idea
with Rick Patton, of TBI
and Fan Eliminator Fame, who immediately offered a far simpler and more
elegant solution. His jig goes over all 6 stud holes and is secured to 3 of the
studs while you drill and tap the other 3 studs. Then you rotate it just once
and do the 3 remaining studs. He's tested it on a spare TA that he has and it
worked great so I'll be doing mine after the New Year. Please note that
this is for use with KeenSerts which require an "X" drill size and 7/16-14
bottoming tap. There's some confusion here because a
7/16-14 tap is supposed to use a "U" drill size BUT.................the
KeenSerts instructions specify the larger "X" drill size. So don't make the
mistake of using a "U" drill. The KeenSerts directions also call for a
countersink but you won't need one when you use this set-up. If you were
"free-handing" the tap, the countersink helps to line you up and get you
started. The tap insert used here does all of that for you.
This ended up working so
well that Rick now
has them for sale on his site.
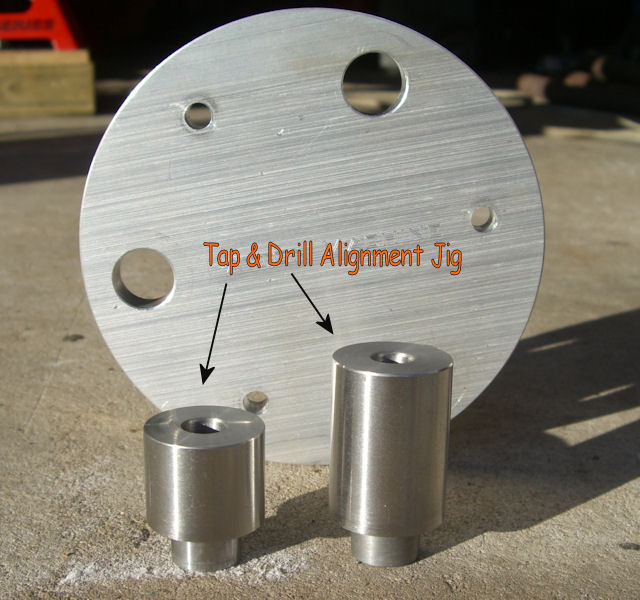
A round aluminum plate
with hardened steel inserts:
One for the drill and one for the tap....... the drill one weighs
over 1/2 pound! |
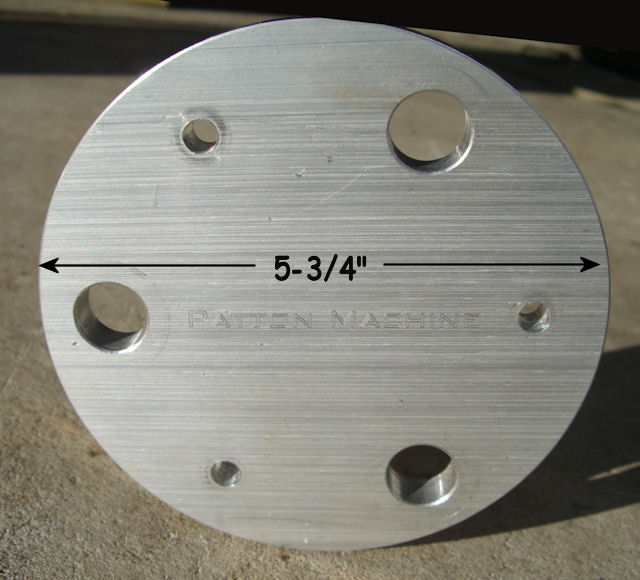
 |
| Yup......1/2" Thick |
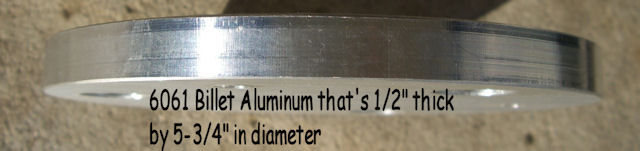 |
| Says it all! |
 |
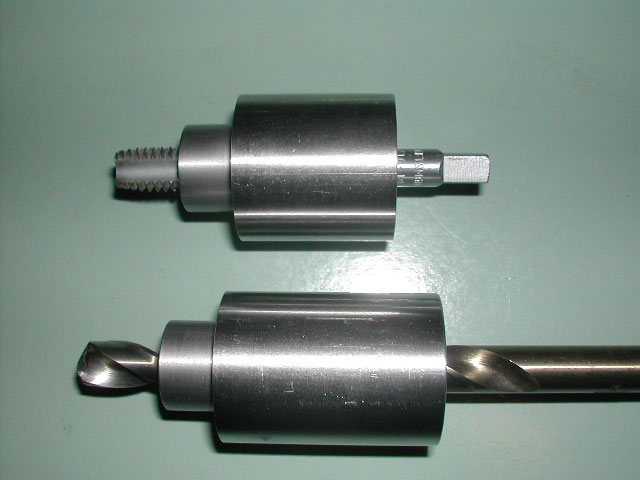
The bottoming tap and
"X" drill bit are not included with the jig.
Bottoming Taps and "X" Drills aren't your normal tools so make sure
you get the
right things.........and yes......"X" is really a drill size. |
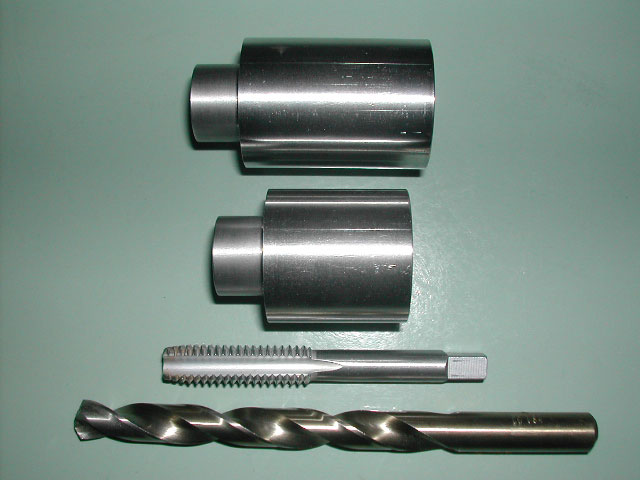 |
| Here's how they slide
together - machined to very precise tolerances |
 |
Time to test fit and
prep the work area.
|


