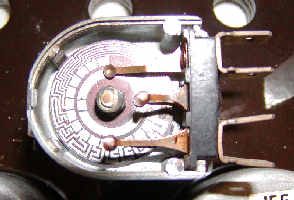
| Back Cover Drilled Out | Rheostat Interior |
 |
 |
Rheostat "Repair"
The installation of Dan's wiring harness requires removal of the dashboard. When I did this for the first time about 7 years ago, I found that the rheostat had been bypassed. Seeing as everything else worked OK, I just left it alone. Now that I'm re-doing all the wiring I decided to a continuity and resistance test to see if it worked. Now I'm no electrical guru by any means but I figured a multi-meter test lead on each terminal would, at least, show continuity through the rheostat if it was working. When I didn't get a reading I figured I had nothing to lose by taking it apart. The late model rheostats differ from the newer ones in two ways: the back cover is "permanently" attached and the internal components are "solid state". The older ones have metal tabs holding the rear cover in place and the internal component is a coiled wire.
|
Once I had it open, I removed the 3 parts of it to clean and test. |
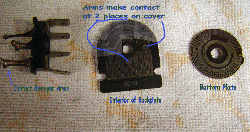 |
As you can see in the enlarged picture of the three parts I almost wrecked the printed circuit on the back plate. I tried to use an eraser to clean it up and it started to come off of the plate. I taped it back down and tested the contact points for continuity and it appears to be OK.
Next up were the sweeper/contact arms
| End view of the 5 contact points | |
 |
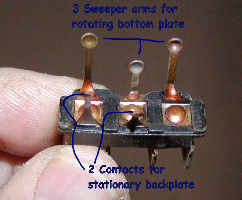 |
The problem appeared to be simple enough: at least one of these arms wasn't making contact. I cleaned them up, bent them out more, reassembled the unit and now had continuity. I also did an ohm resistance test and got varied readings when I turned the knob.
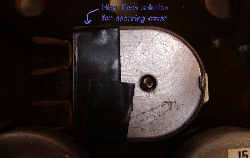
Reassembling it did present one problem. The rivets that I drilled out weren't rivets at all. They were part of the case. I tried to drill them all the way through the case but decided to take the easy way out.
| Oh well, no one will ever see it again |
 |
Now that I've done all of this I don't know if I want to risk hooking it up again, as I'd have to pull the dash again to fix it or re-wire it.