|
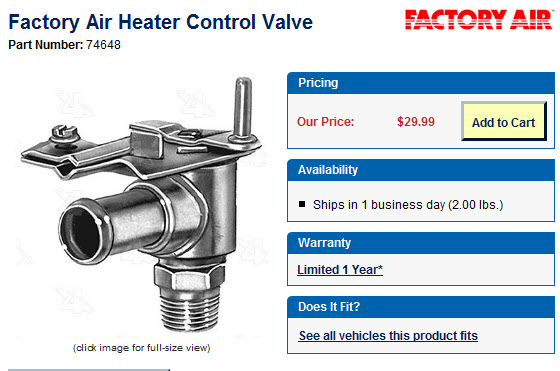
New
Heater Control Valve
I'm on my second heater
control valve in the past 11 years but I'm doing way
better then some people who have experienced multiple
valve failures. The failure point, or so I'm told, is
the diaphragm which can suddenly tear causing the
coolant to leak out. When this happened to me, I was
able to make it home by running the heater valve wide
open effectively by-passing the tear. But the thing
about the valve that drove me nuts was the fact that it
almost took two hands to open and close the darn thing.
It's just a terrible design and there had to be
something better out there. I did a post to the Triumph
Mail List as well as the 6-Pack Forum and in a day or so
I had the response I was hoping for. Robert Jones, a
certifiable TR6 nut, from California had hunted down a
replacement valve many years ago and sold them at local
car shows. Robert is a 73 year retiree who has been
collecting TR6's and TR6 parts for over 30
years........but that's a whole other story. Once he
told me that Herman van Der Akker, of Toyota 5 speed
conversion fame, had this valve in all of his Triumphs I
was sold. I paid Robert his $40 plus shipping and the
valve was on its way east via Fed Ex. Shortly after
shipping it, Robert emailed me to say that he found the
part is now selling for $30 so he sent me a $10 refund!!
Not too many guys would do that or this...........he
told me the part number, where to order it and said to
share the info with other enthusiasts. Now that's a real
nice guy. So here you go........
BTW......these used to be
very easy to find at about $25-$30 but now it takes a
bit more searching.
NOTE: Check out Autozone.com for Everco/Heater Control
Valve Part# 74648 which is the same at the one below.
The August 2012 price was $22.99.
|
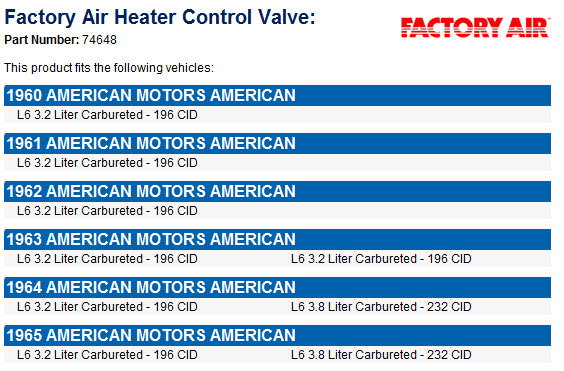
I grabbed this
info off the web so that people would have a
part number and some car references to use
in sourcing one. |
 |
|
And here's the
cars and trucks that use this part. |
 |
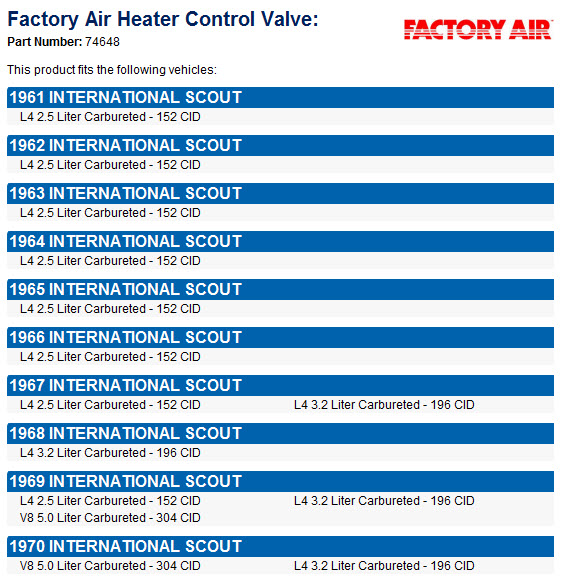 |
What struck me as funny is
that this part is from cars that are actually much older
then my TR6. But it's an almost perfect fit and works
way better........so very smooth to open and close.
|
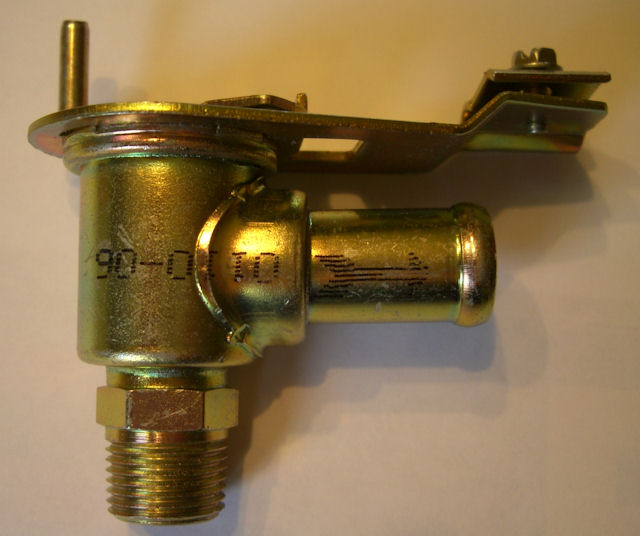
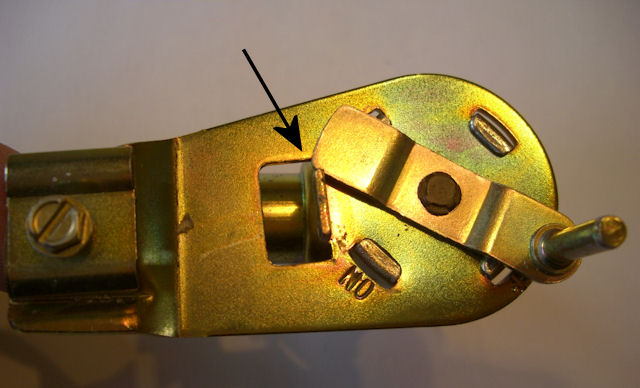
An arrow for the
water flow impaired! |
 |
|
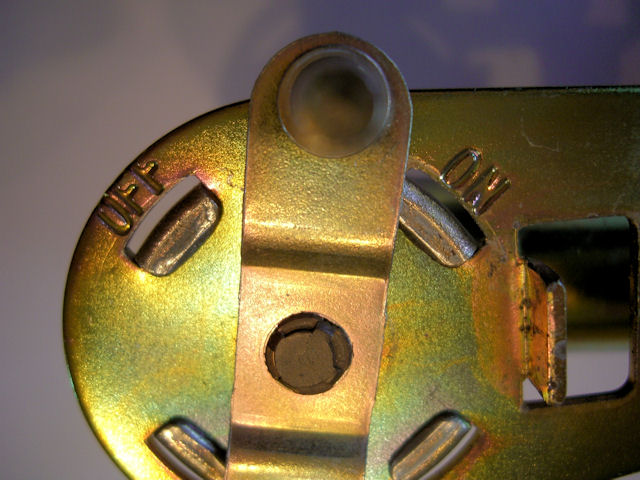
On & Off markings
make it easy to set up |
 |
|
In the Off
position up against the stop bump. The On
position also hits the stop. |
 |
It's a little different
look then the old one but I have no problem with that.
If nothing else, people will ask about and probably end
up installing one in their car too.
|
Off with the old! |
 |
|
Side by Side -
notice a potential problem?? |
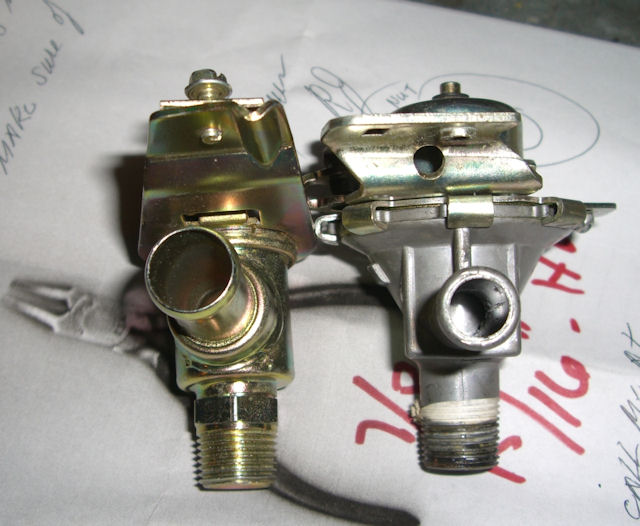 |
As soon as I put them side
by side I knew I had a little problem. The old valve's
hose barb was 1/2" while the new one is 5/8". I have
lots of hose barbs left over from my
TBI conversion so I figured I'd just grab a 1/2"
barb and a 5/8" barb and connect them with a coupler.
Then a short length of 5/8" heater hose and all would be
well. My only concern was the introduction of two more
hose clamps and two more potential leak points. (NOTE:
See two pictures at the end of this section as I had to
go with barbs after installing new hoses) And then
I got an email from Robert saying to "grease up the
heater barb and just rotate and force the hose on. So I
removed the heater hose from the firewall, smeared some
copper anti-seize on the heater barb and heated up the
hose end with my heat gun..........and it slide right on
with just a little force.
|
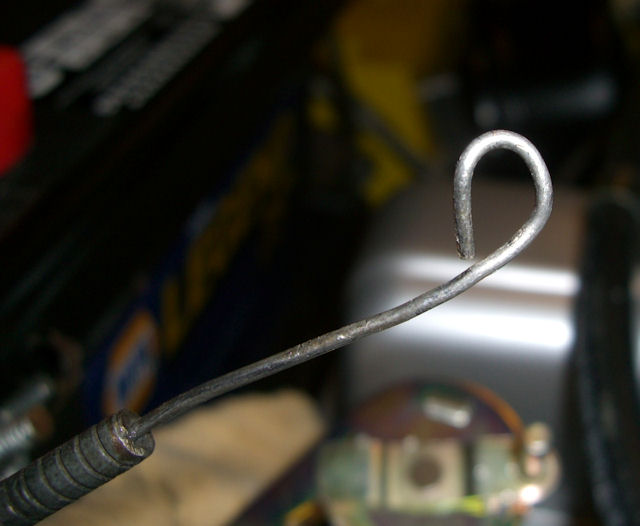
There's no cable
lock on this valve so just make a loop at
the end of the wire. Which is
easier said then done! Make sure you do your
measuring with the valve in the closed
position. The one thing I wish I had done
was to pull the inner cable out and then
cleaned and lubed it. I think it will just
slide out at the knob end.
FYI..... this wire is miserably stiff to
work with! |
 |
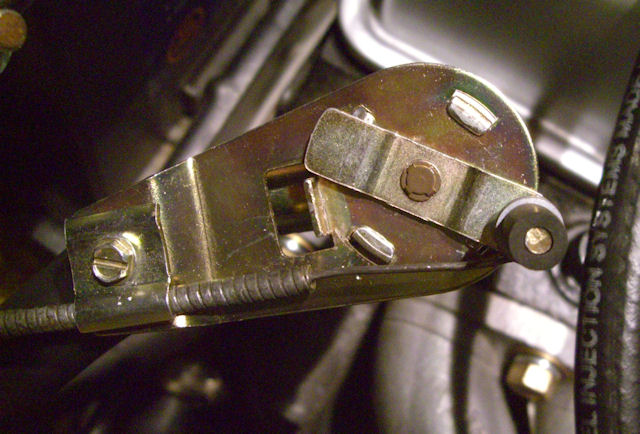
|
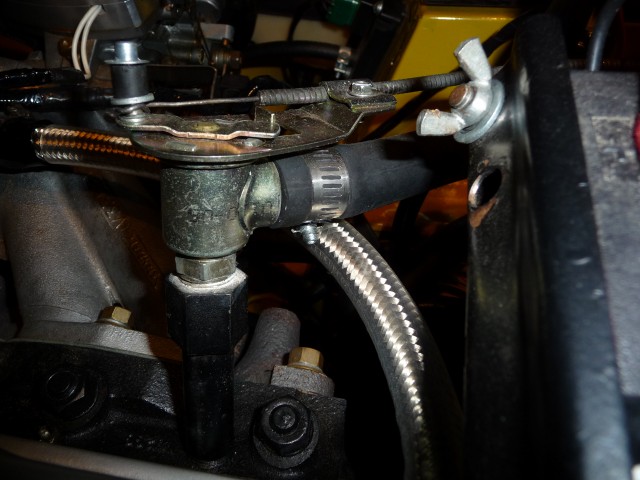
Everything hooked
up and in the closed position |
 |
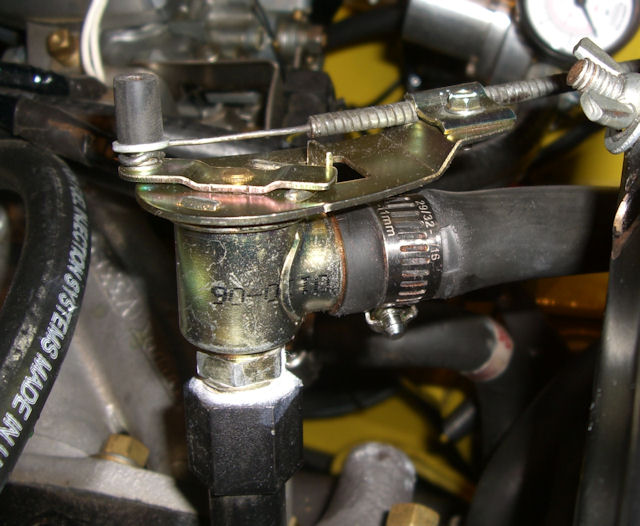
|
From this side
view you can see that I put a small washer
over the top of the cable and
then "locked" it in place with a short
length of rubber hose. |
 |
|
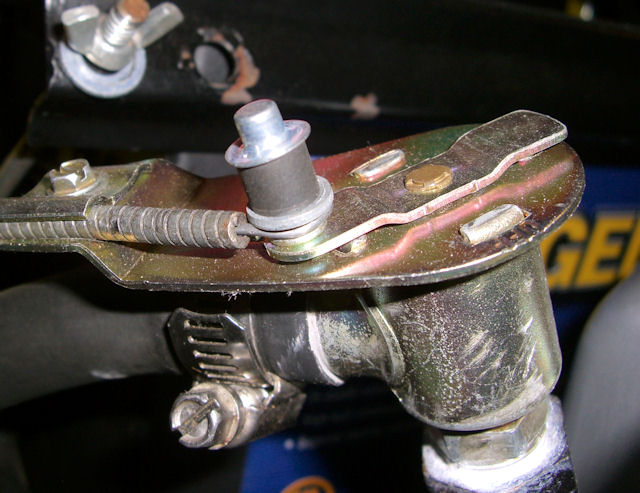
Another view
showing the washer and the hose covering.
The wire is so stiff that once
the outer housing is clamped in place, the
wire can't jump off the post anyway so the
washer, hose piece & cap are purely cosmetic. |
 |
|
It's about 5 years later and I installed all
new hoses in my car and there was no way I
could persuade that 1/2" hose over the 5/8"
fitting! |
 |
|
So I went the route I initially considered
and got two correctly sized barbs and a
conector to tie them together. Now the hoses
are the correct size for the barbed fitting. |
 |
And that's all there is to
it. The dash control knob works very easily now and it's
infinitely adjustable if you remove the little ball from
the knob interior. Robert told me that there's a little
ball bearing in the knob that engages the indents that
are in the knob shaft. If you remove the ball bearing,
it works even more easily and can be opened or closed to
any position.
As usual, the first start
up after doing any work on the car is always a thrill,
not knowing if everything will work as advertised. And
this was no exception........as the engine warmed up I
got puffs of white smoke from some Teflon thread
compound that got on the manifold along with a little
anti-seize and some coolant. BUT......no leaks from the
valve or the hoses and a quick top down test drive on a
40 degree night confirmed that the heater works just
fine!
As my 7 year old grand
daughter would say "easy peasy lemon squeezy"
|


