I've always wanted a lift but
our garage is neither big enough or tall enough for a
two post car lift but.............. in the past couple
of years, two very interesting options have come to
market.....Dannmar's
MaxJax, a "portable" two post lift that requires
permanent anchors in your garage floor. The MaxJax has a
maximum lift height of 45" which makes it a "chair" lift
i.e. you sit on your roller chair to use it as you can't
stand up under it. The other option is
the
EZCarLift which is a completely portable lift that
has a maximum lift height of 26". If you're like me,
you're immediate reaction is that a 26" lift height
makes no sense and can almost be achieved with jack
stands and wood blocks. I've gotten my car about 18 -
20" off the ground using that techique but the safety
aspect is, at best, questionable. So what was my thought
process for making this decision and what got me
started.............. it started with a very very
profitable 9 months during which I sold
60 Fender Blankets and
20 Interior Panel Kits.......... you can't take it
with you so you might as well spend it on the car that
got you there...........and make sure you buy your wife
some nice presents too!
MaxJax - is often sold by
Costco for $2300 delivered.
EZ Car Lift sold direct
for $1900 delivered under a Father's Day special.
MaxJax requires permanent
anchors in the garage floor and storage for two 64" lift
columns that weigh 300 lbs each plus the lifting motor
and hydraulic components. Total weight of over 800 lbs.
The column are on wheels but for a guy with a bad back,
that's a lot of weight and bulk to be moving around and
storing.
EZ Car Lift is completely
portable, rolls around the floor with a gentle push with
the foot and can be lifted and stored on it's side with
no problem. Each lifting ramp weigh about 60 lbs which I
can handle. Think of it as two really big sissor jacks
connected together.
MaxJax takes about 30
seconds to get it to its maximum height of 45" and then
requires the use of a stool on casters to move around
under it.......and the stool has to be the proper height
relative to your body height.
EZ Car Lift takes about
110 seconds to get it to its maximum height of 26" and
requires a 1/2" drill with a minimum of 7.5 amps and
1000 rpms. Pretty much any creeper will work or you can
just lie on the floor.
Two interesting choices
aimed at guys like me who don't have a garage that can
easily take a two or four post lift.
The MaxJax was very
tempting and would add to my Costco 2% cash back card
but I didn't want to risk my back manhandling those 300
lb columns. So I went with the EZ Car Lift and am
pleased with my decision for a few reasons: portability,
speed of set up (MaxJax lifts faster but takes much
longer to set up when you want to use it) and working
room under the car.........I was amazed at how much room
26" gives you.
So here's the assembly and
use process.
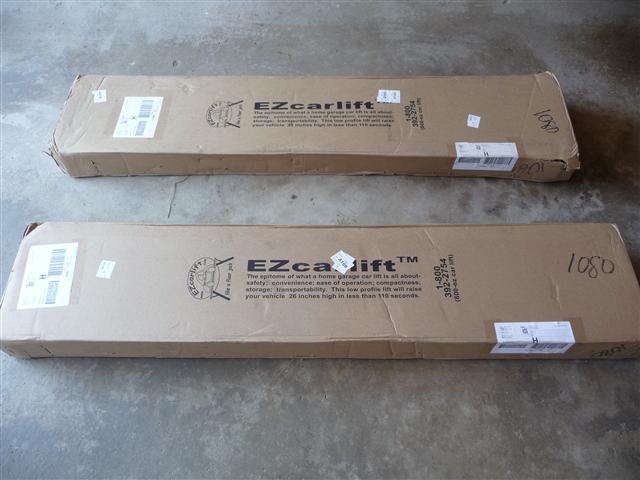
The
lift comes in two boxes weighing about 65 lbs
each.
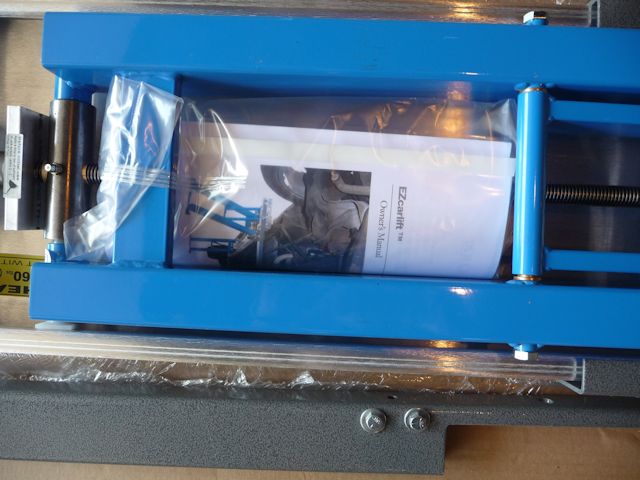
Nicely protected
Instruction Manual
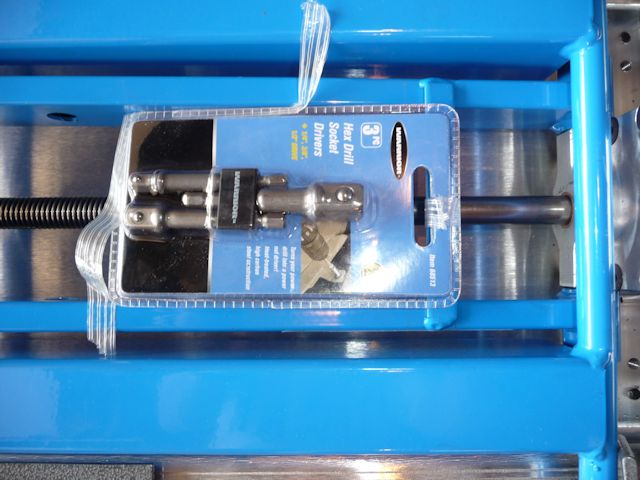
Socket drives for your drill
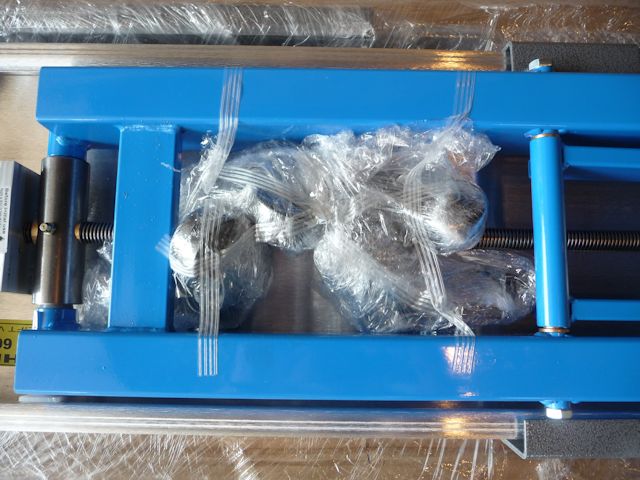
The
studs are part of the lift and make sure you save
all the hardware as you'll need it for assembly.
This is the "slave" end of the lift.
The
gear box end of the lift has bolts which also need
to be saved.
The
four casters.
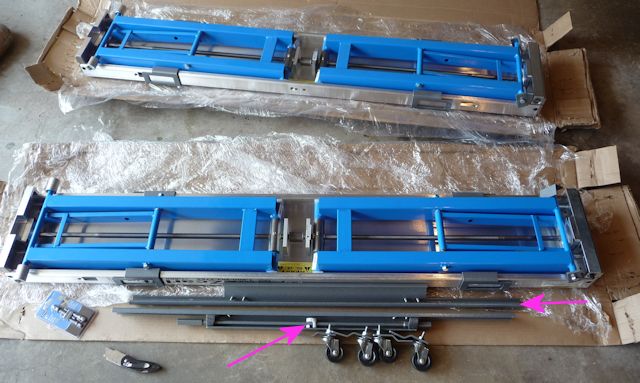
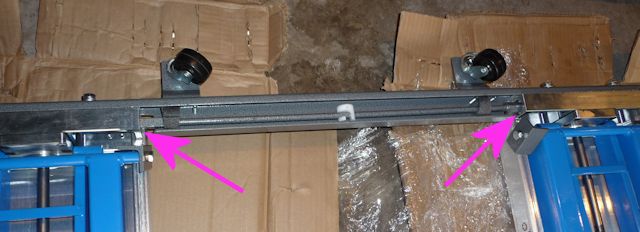
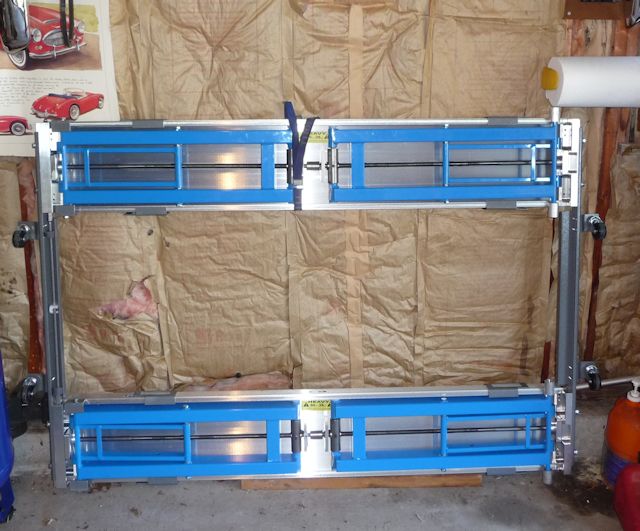
Everything unwrapped and the arrows pointing out
the cross pieces.
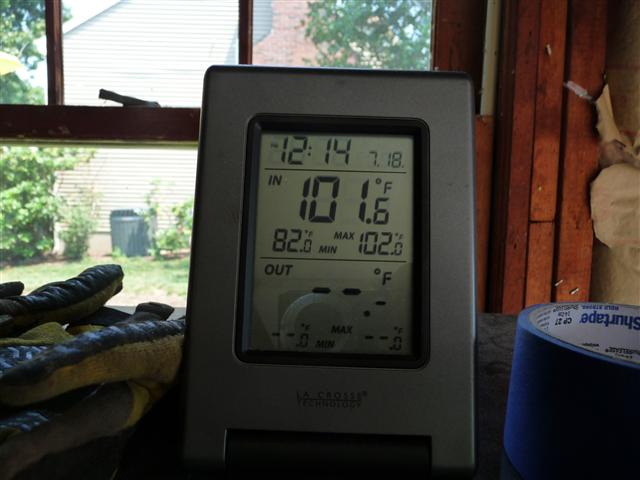
This
was the garage temperature when I started and it
climbed to 103 as I worked on the
lift..........with LOTS of frequent A/C and drink
breaks.
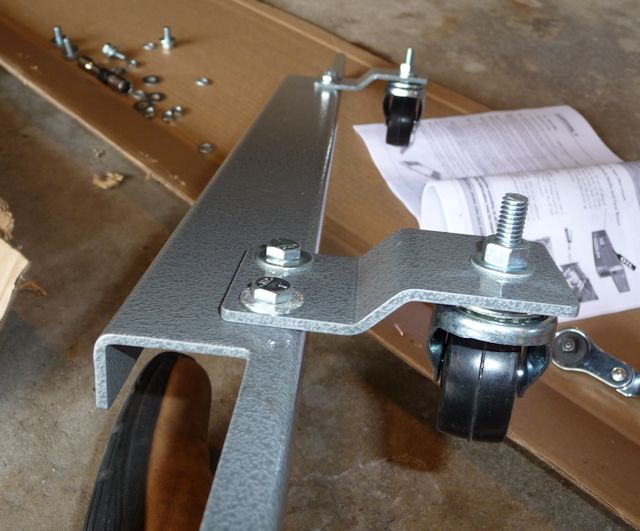
The
directions on the casters are somewhat confusing
with one picture saying to install them this way
while all the other pictures show them pointing to
the left. Seeing as I actually read the directions
instead of just looking at the pictures I got them
right the first time.
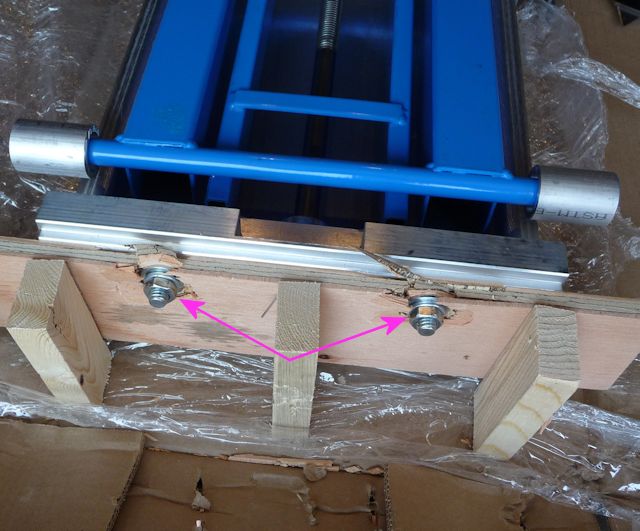
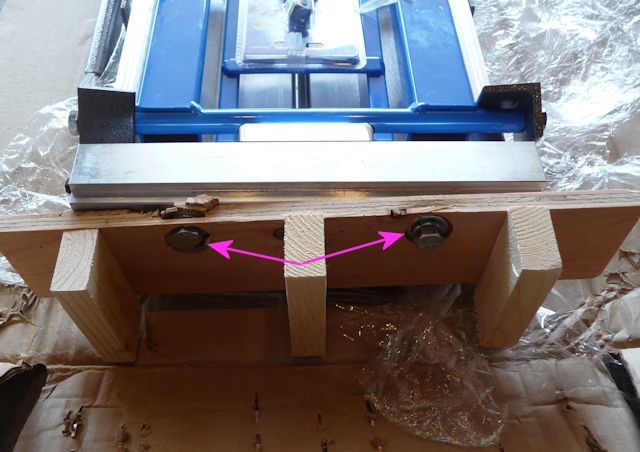
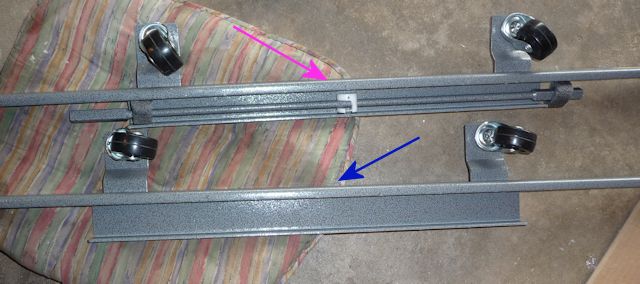
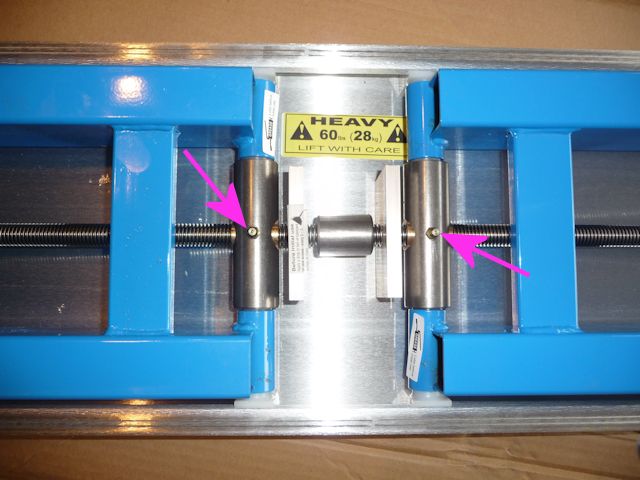
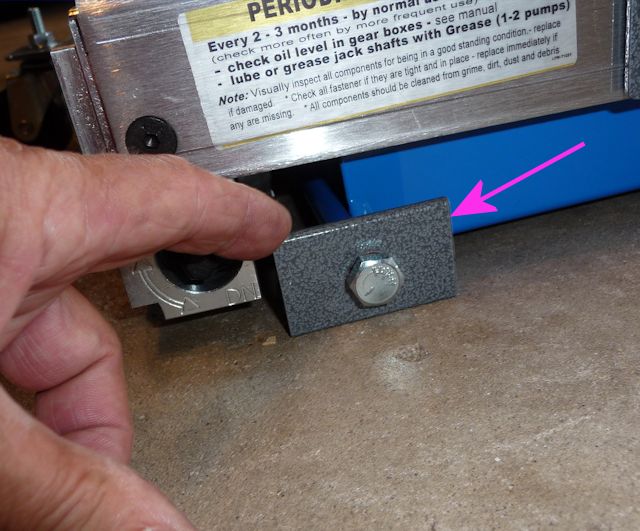
The top
cross piece (pink arrow) goes to the gear box end
and the other piece is the slave cross piece. Once
the car is in the air the slave cross piece can be
removed to gain more room if, for example,
you needed to drop the oil pan.
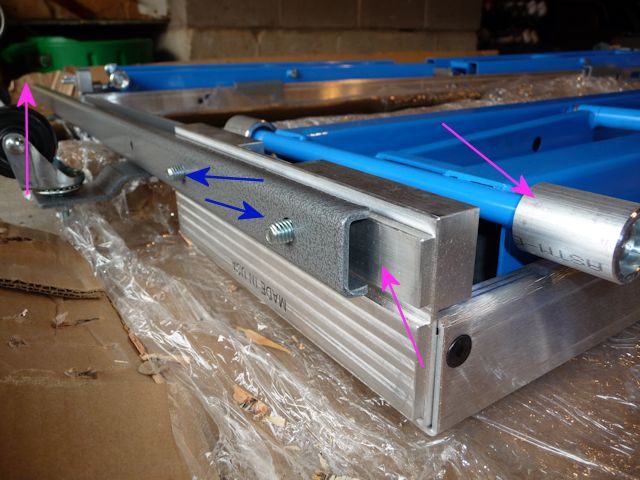
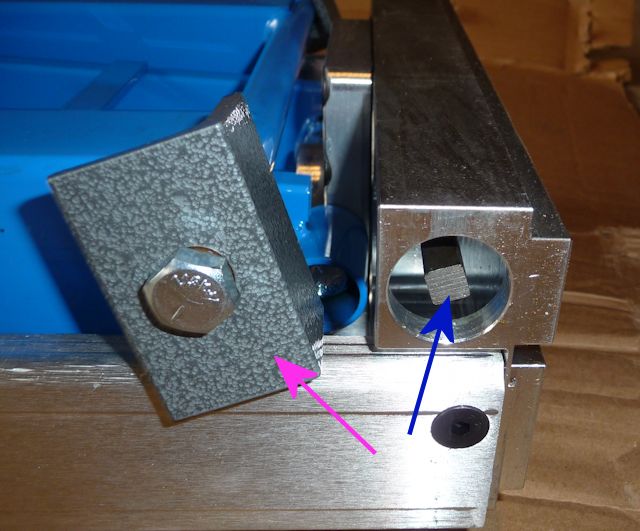
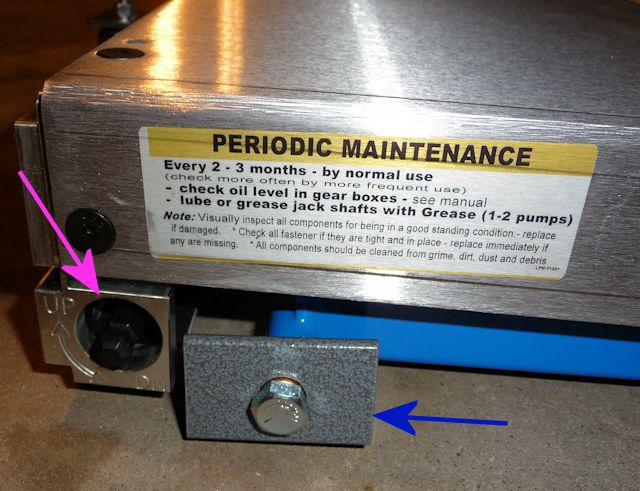
The
lift is upside down with the casters pointing up
and the ramp wheel on top. You can tell that this
is the rear/slave end of the ramp by the studs
(blue arrows). As you can see the cross piece is a
U channel made to fit over that machined cut out
on the end of the ramp.
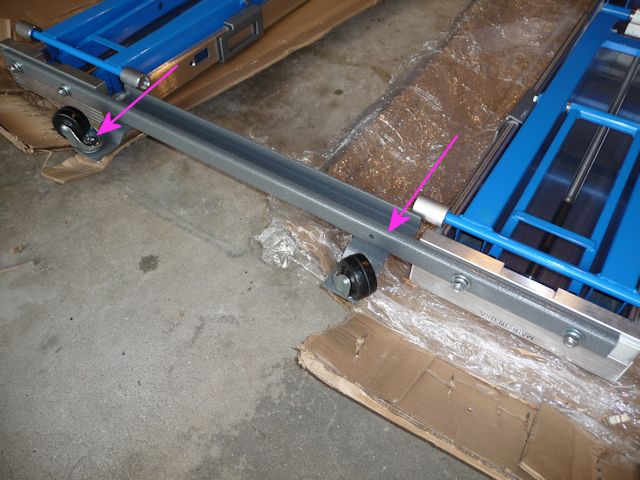
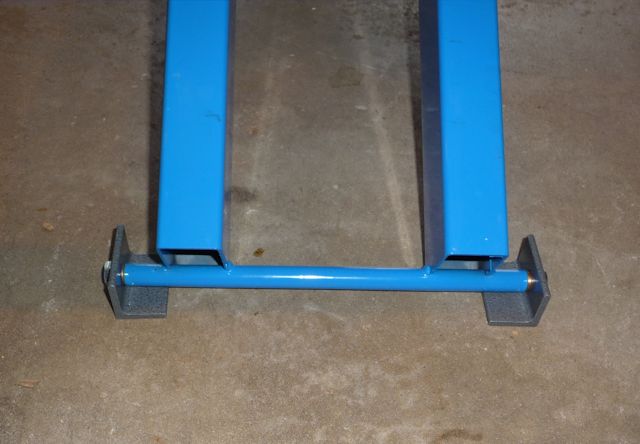
Here's the rear/slave end complete with the
casters on the out side.
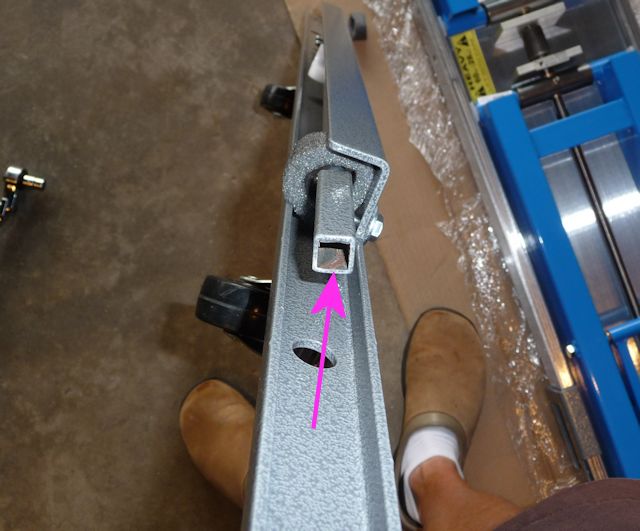
This is
the gear box end and the blue arrow points to
where the cross piece will attach. The pink arrow
points to the foot that will rest on the floor
when you jack it up.
Here's
the cross piece with the arrow pointing to the end
of the transfer rod. This will slip over the gear
box piece in the photo above.
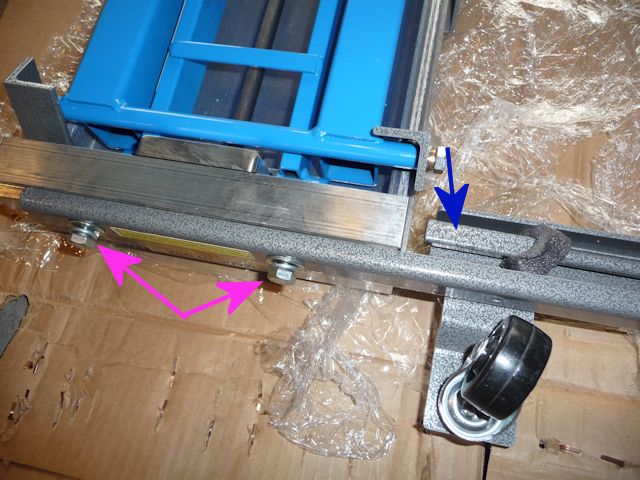
Bolts = gear box end of ramp. The transfer piece
(blue arrow) will slide left.
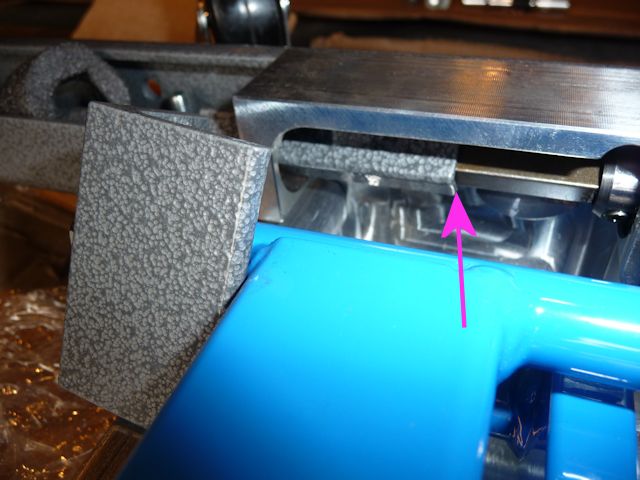
Here's the two pieces coming together.
Gear
box end complete with the transfer piece catching
the gear box rod on both ends.
Call
the wife and flip it over! One person can do it
but it's easier and safer with two.
The
pink arrow points to the lift mechanism that your
drill will attach to. And there's the foot that
rests on the floor when you start to lift.
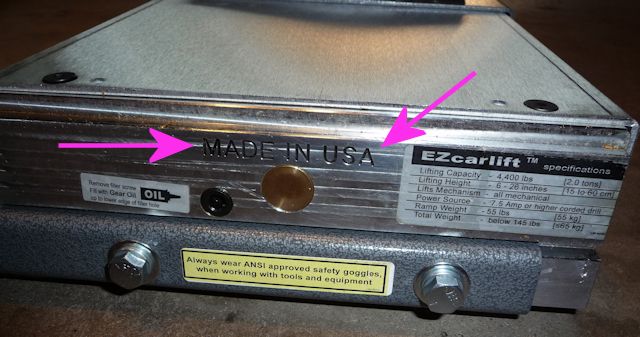
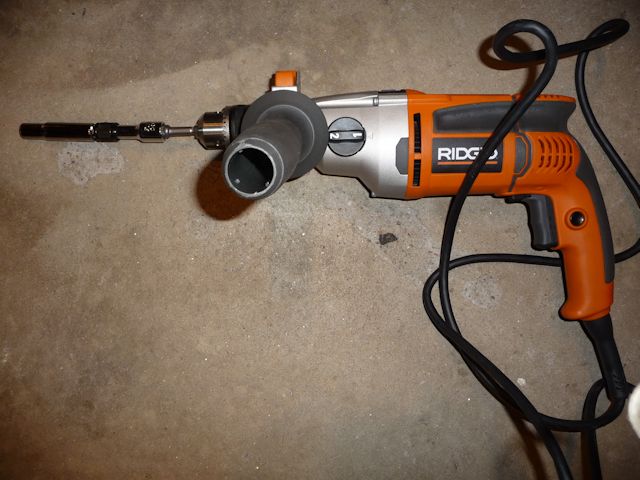
You
don't see this much much anymore!
This is
an 8.5 amp two speed drill from Home Depot. You
need a minimum of 7.5 amps and lots of torque to
get your car up in the air.
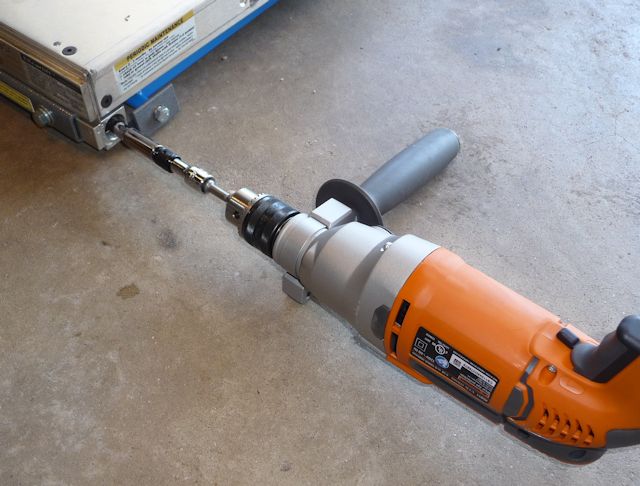
First thing is some pre-maintenance with no load
on the lift.
Get
it about 16" in the air to check the gear oil
level.
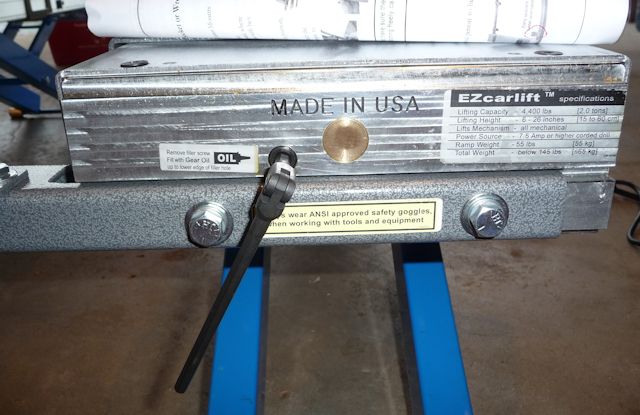
A
1/4" hex removes the plug to check the level.
Here's my one "complaint".... the manufacturer
ships the gear box full but requires a specific
gear box lube that they sell with special
additives to deal with the temp and stress that
the gears go through when lifting. That fact
should be brought up when ordering so you can have
a bottle tossed in with the lift shipping
cost...........or just include a bottle and add
$10 to the overall price. My guess is that if you
go to use your lift and find it low on gear lube,
you'll use whatever gear lube you have rather then
order it on-line, pay for shipping and then wait
for it to be delivered.
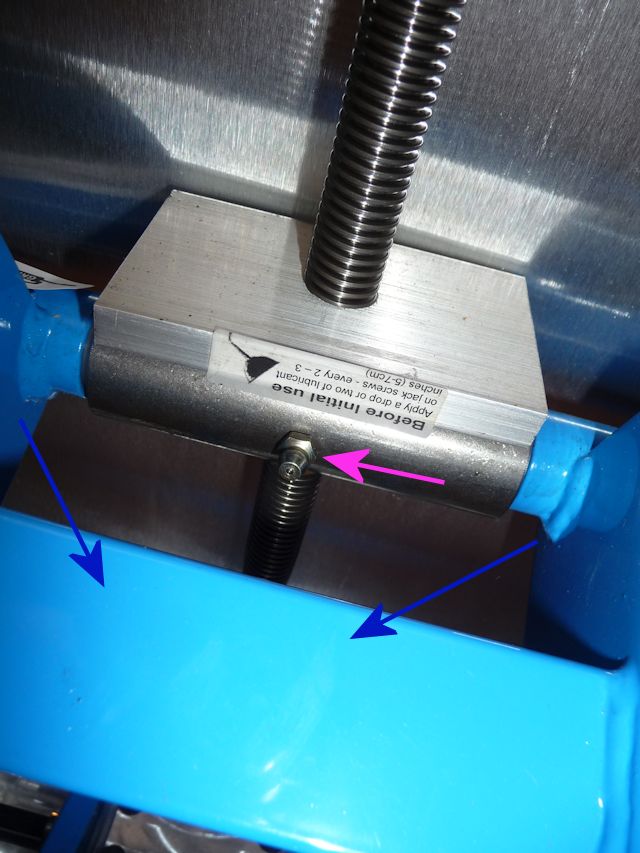
There's
two grease fittings under the ramp. This picture
was taken when the ramp was still upside down.
After
you check the gear box lube, you raise the lift to
its full height and hit the two grease fittings
with two shots of grease...... any auto grease
will do. Then you lower it half way and give it
one more shot. The only problem is that there's
not much room for your grease gun fitting when the
lift is raised. That blue cross piece gets in the
way.
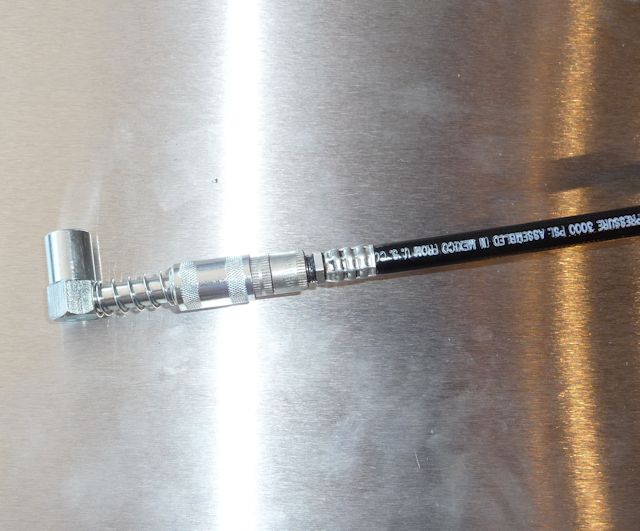
To
make it easier you can pick up a 90 degree fitting
for about $4.
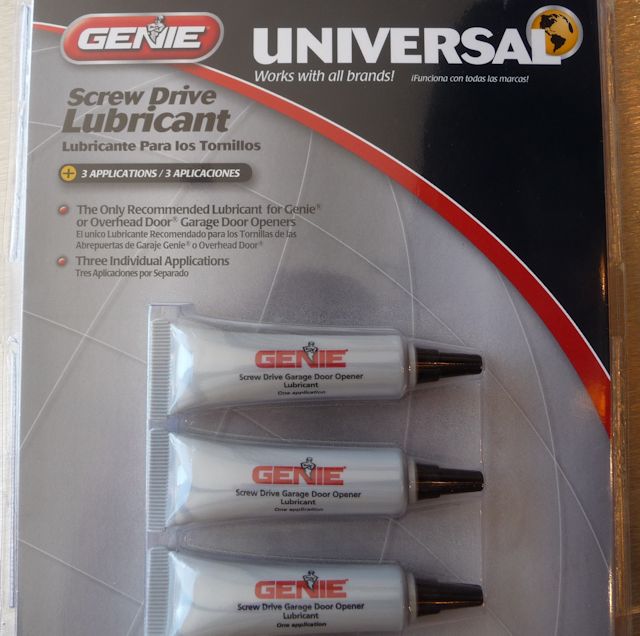
The
instructions also say you can oil the jack screws
but all I could envision was oil all over the
floor as it dripped off of the screws. I picked up
some garage door worm gear lube which tends to
stay in place better than oil.
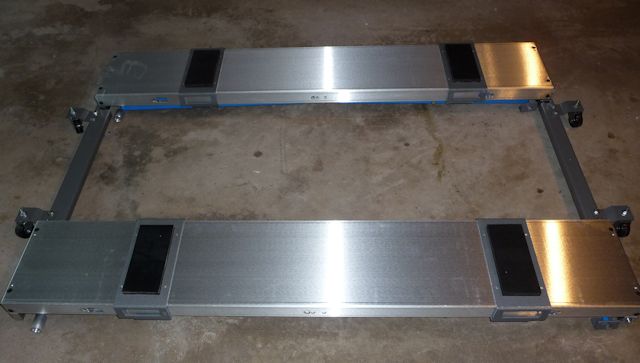
The
pads slide left & right so you can position them
as needed.
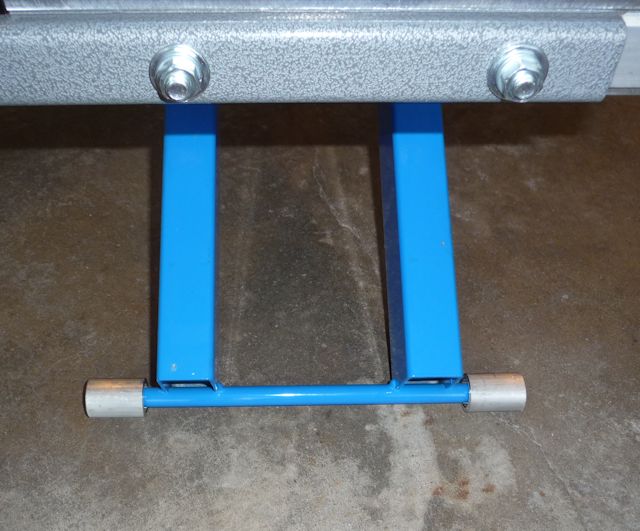
As
you raise the lift, these pads at the gear box end
drop to the floor so it can't move.
The
other end has these wheels so it can move up &
down.
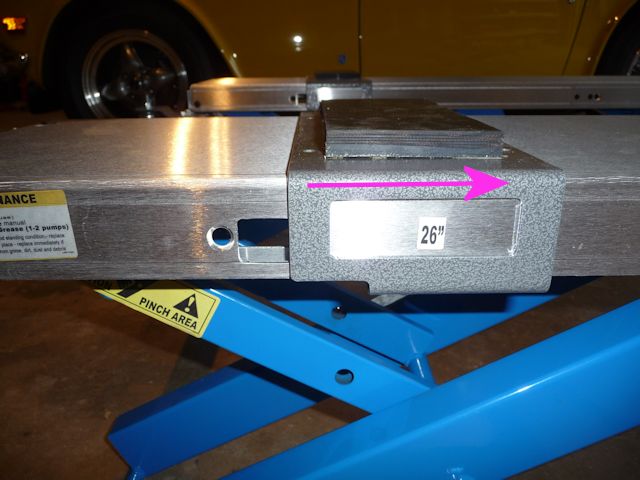
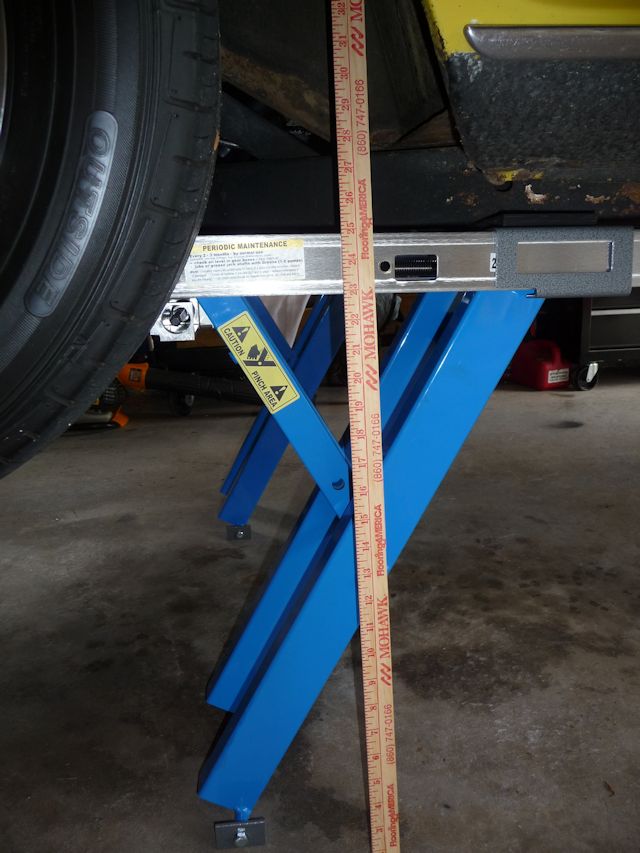
It's
critical that you don't over-extend the lift past
26" or it can cause "fatal" damage and your car is
stuck in the air! So I placed a yardstick right by
the ramp. To be honest I didn't bother timing how
long it took but it's much quicker than a floor
jack and jack stands!
Once
I got the pads where I wanted them I marked the
location with magic marker.
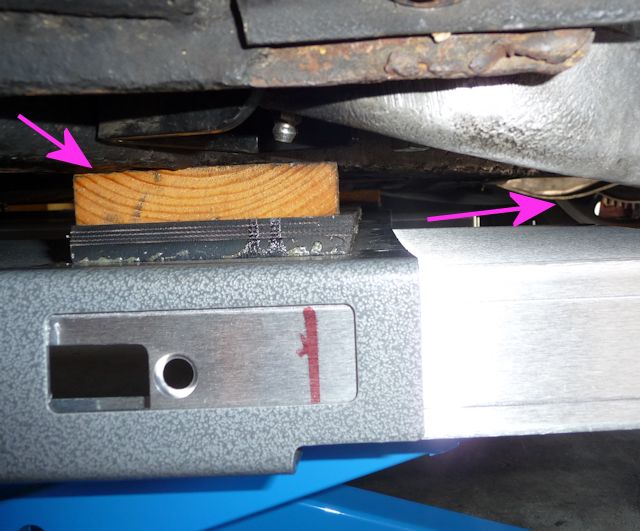
At the
rear end I used a 1/2" block of wood to give me
clearance from the Trailing Arms. It also leveled
the car off as my garage floor has a very slight
slope.
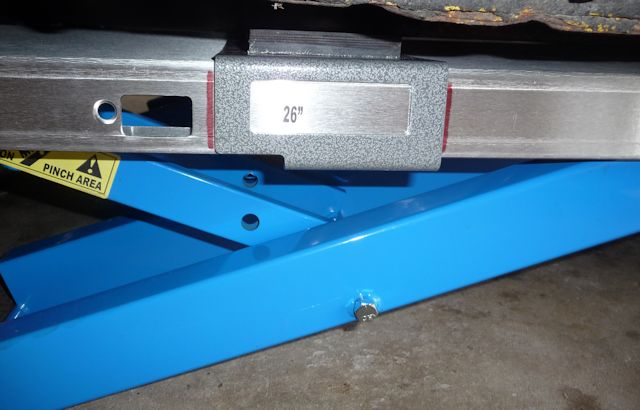
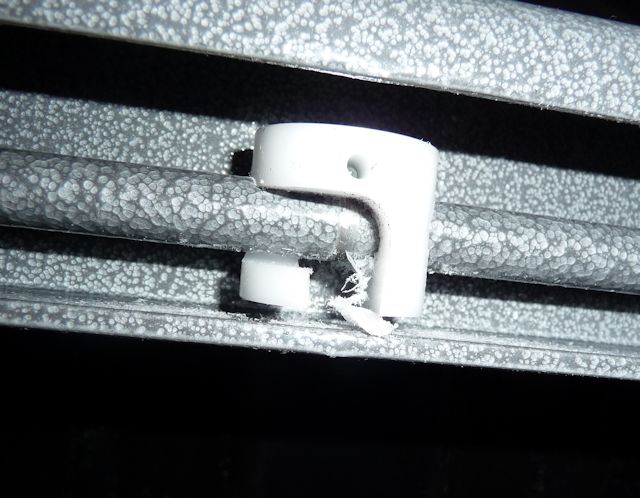
This
nylon anti-rattle piece chews itself up as the
cross rod rotates but will stop once it gets to
the size the rod wants it to be.........or so I'm
told.
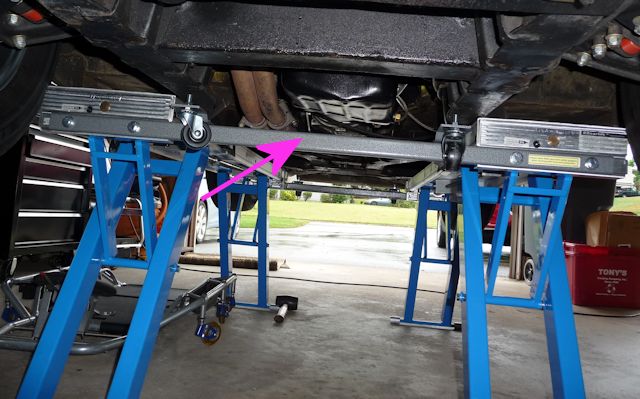
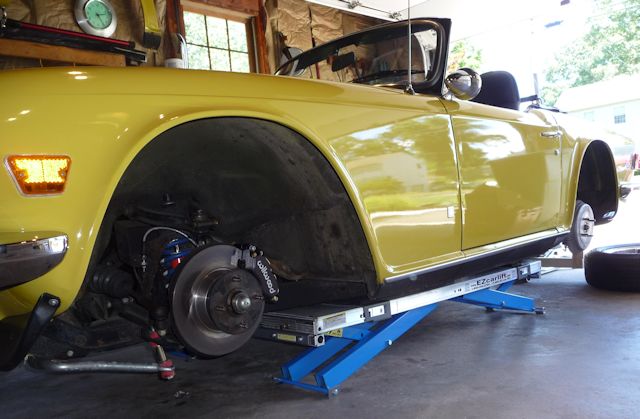
The
picture perspective is a little skewed but the
frame is resting solidly on the ramp. The slave
cross piece can be removed once the car is in the
air to gain more working room.
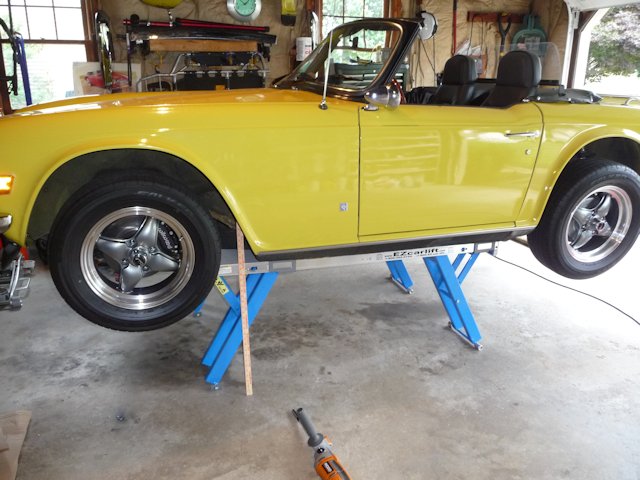
At
full height.
Ready to have the brakes bled and adjusted.
When
it's time to lower the lift slow down as it
approaches the bottom and STOP when you see the
pads lift off of the floor so as to not damage the
gear box.
When
I was done I lifted it up on a 2x4 and secured it
to the wall.