|
Accelerator Shaft
Bearings/Bushings - 3 Options
Hint...Hint....... I like Option 3 the best!
One of the more patience testing
tasks to accomplish is the replacement of the two nylon bearings
that hold the accelerator shaft in place in the bulkhead. A
quick check at any car show will find that one or both of these
bearings are missing. With my engine out, I figured it was the
perfect opportunity to replace them both.............seeing as
both on mine were missing.
Option 1 -
Concurs Proper - but a Pain in the Butt
As part of a parts order from the
fall I had the two bearings on hand. I soaked them in boiling
water and then soaped them up and got about 1/4 of the first
one. I figured I needed a thin bladed screwdriver to push the
leading flange through but all that accomplished was to push the
thin blade right through the flange. Ooops..........better try a
thicker bladed screwdriver which worked just fine. The first one
took about 10 minutes while the second one was done in about 2
minutes. Simple...easy..... now let's put the accelerator shaft
back in............except it won't fit. There's not enough room
to get it in the bearing without the interior kick panel
blocking the way. So I figured I had two options: remove the
kick panel to see if that freed up sufficient room
or..........remove the driver side bearing, put the shaft
through the hole, slide the bearing on the shaft and then try
and fit it in the bulkhead hole. Now I know how hard that second
choice would be...... they're hard enough to put in without the
shaft in the way. I emailed the Triumph and 6-Pack Mail lists
and got confirmation that my two options were the only two
options. Someone did mention that the drivers side bearing must
be installed from inside the car and not from the engine bay. I
pulled that bearing out and upon examining it discovered that
the opening is actually wider at one end and then tapers to the
shaft diameter. If installed from inside the driver's side, the
wider opening is available to accept the shaft. So did I
re-install it? Nooooooooooo...read on.
Option 2 -
Bronze Bearings & Locking Collar - OK but not the best option
When I asked my previous question
to the Mail Lists, I got a number of responses suggesting the
use of Bronze Bearings and Locking Collars. So I ordered some
and immediately found a few problems:
- a 3/8" shaft does not fit
through a 3/8" bearing especially with the splines on the
end of the shaft and/or if the shaft has been painted.
- the bearing is too long and
blocks the cotter pin hole on the end of the shaft in the
passenger foot well.
- a 3/8" locking collar doesn't
easily fit over the splines or a painted shaft.
- AND the bronze bearing and
the locking collar scratch the heck out of a freshly painted
shaft. I'll have to repaint my shaft once all the testing is
done.
Problem one is resolved with a
Letter "W" drill which drills the 0.38" bushing to 0.386". An
easy solution if you happen to have a Letter "W"
drill............which luckily I have. I also have a drill press
which made it "easier" but be careful as the bit size is so
close to the hole size that it grabs the bearing and twists.
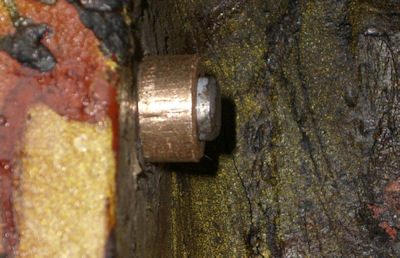
Problem two is that the bearing is
too long and blocks the cotter pin hole where the shaft passes
in to the passenger foot well.
Bushing is too long. No room for washer & cotter pin.
This is a safety issue for me. |
 |
For some people this may not be a
big deal but to me it meant that if the locking collar should
ever loosen up, the accelerator shaft could move out of the
bushing......no cotter pin to hold it in place. That's not a
risk I want to take.
One other minor issue is that the
bulkhead holes are probably out of round from having the shaft
in there without a bearing to support it. If you try and
hammer/tap a bronze bearing in place, chances are pretty good
that you will crack it. This is easily resolved with a 5/8"
grinding stone for your drill or Dremel. If I was doing this
again, I'd get a stone that tapers from 1/2" at the tip to 5/8"
at the back. That way, you can grind a little at a time and test
for a nice tight press fit for the bearing. The one I used was
5/8" from tip to back.
Option 3 -
Delrin Bearings & Locking Collar - made to order solution
I had just finished
installing Art Lipp's Delrin
steering column bushings and got to thinking about both his
bushings and the Nylatron suspension bushings that Richard Good
sells. They're both made out of a self lubricating, virtually
indestructible plastic/nylon. What not make the shaft bearings
out of the same material? I emailed Art with a picture of the
bronze bearing along with all of the critical dimensions and a
few days later I had a set to test fit.........along with an
aluminum locking collar that he also made. Here's the advantages
of his kit as I see it:
-
The kit is
complete with bearings customized for driver and passenger
side, aluminum locking collar and a Delrin washer for passenger
side
-
The bearing hole
is a perfect fit on the shaft. No need for any extra
drilling.
-
The Delrin
doesn't scratch the shaft paint.
-
Metal to Delrin
has to be better then metal to metal from a friction
standpoint.
-
Delrin is self
lubricating.
-
The passenger
side bearing is cut shorter to allow for the washer and
cotter pin.
-
The driver side
bearing is kept longer due to more stress on that side.
-
The locking
collar hole is a perfect fit on the shaft. No need for any
extra drilling.
|
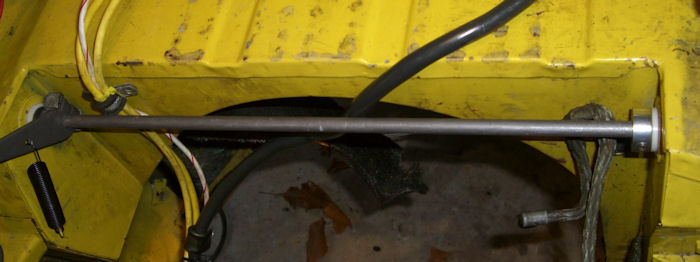
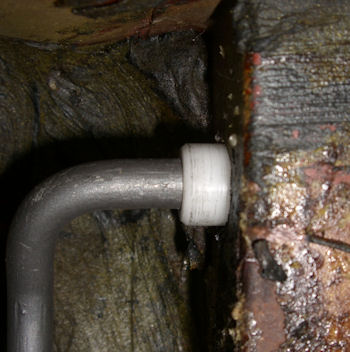
All Installed |
 |
|
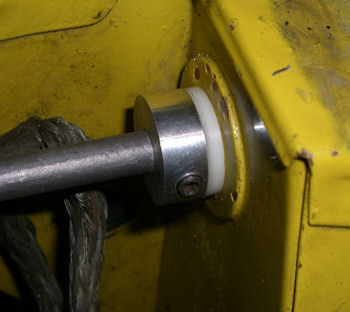
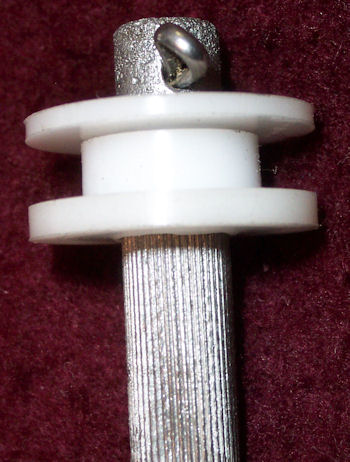
Driver Side Bulkhead with Locking Collar to keep
it from moving to the right. |
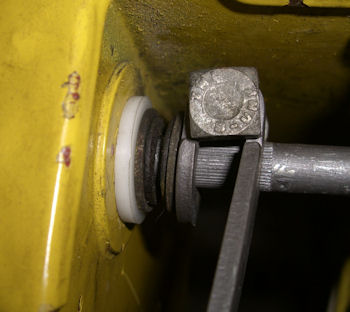
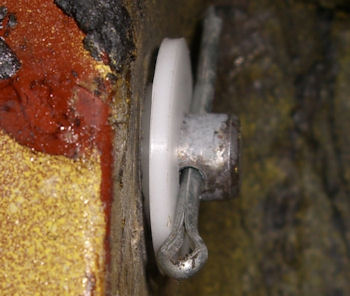
Passenger Side Bulkhead - The Control Lever
locks this side from moving left |
 |
 |
|
Driver Foot Well. Extra length for support |
Passenger Foot Well with washer & cotter pin |
 |
 |
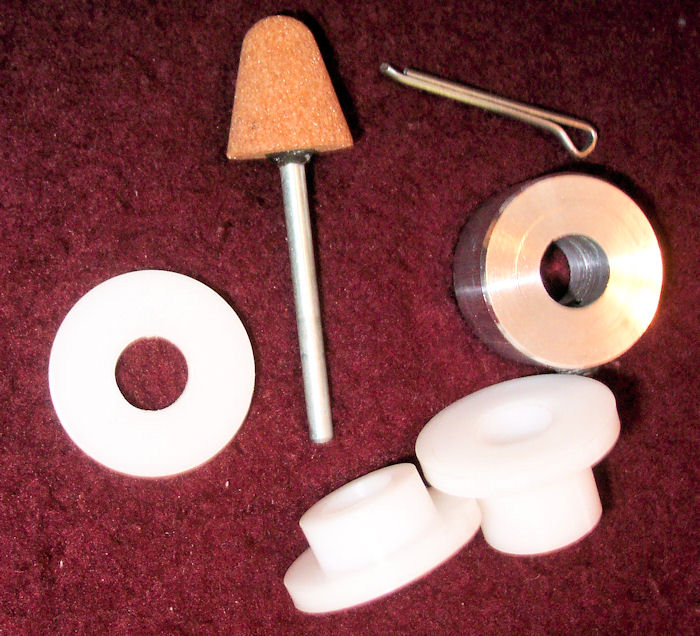
Art has finalized his
kit and sent me the following pictures. As you can see, this is
as complete a set as you can get. No drilling or reaming of
parts required!
Parts Clockwise: Grinding
Wheel to round out bulkhead hole, Cotter Pin,
Locking Collar,
Driver Side Delrin Bearing, Passenger Side Delrin
Bearing & Delrin Washer |
 |
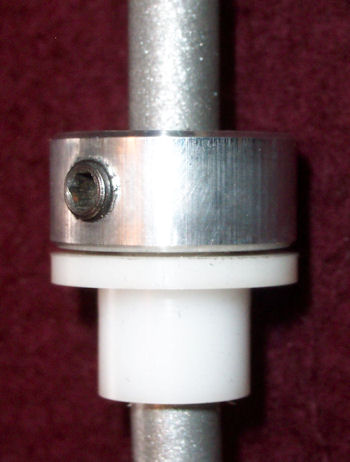
| Driver
Side has long bearing & locking collar |
Passenger Side has short bearing to allow for
washer and cotter pin. Safety First!! |
 |
 |
If you like what you see, drop Art
an
email for pricing and shipping information.
|


